Building a Provider-Agnostic AI Agent with Microsoft.Extensions.AI in .NET 10
So far, the code we have explored has been either using AI provider packages directly (like the OpenAI NuGet package) or making calls to APIs directly. We have essentially been writing out classes and handling HTTP requests manually in C#. While that works for simple demos, it is not a particularly scalable approach for real-world applications.
In this post, you are going to create a brand new C# console application that uses the official Microsoft.Extensions.AI library.
The Microsoft.Extensions.AI package is a set of libraries from Microsoft that brings the familiar .NET extensions model into the world of AI development. Think of standard concepts like dependency injection, configuration, and logging; this library brings all of that infrastructure to your AI code.

It also gives you some nice, clean interfaces. There is a critical interface called IChatClient that we are going to be implementing. Instead of tying your code directly to OpenAI, Azure, or some other provider, you write against these stable interfaces. This means you can swap out the backend and try out different reasoning models without rewriting your agent code.
It goes a bit further than that, though. Once you are using the library in this package, you can layer in functionality like distributed caching, function invocation (which we will cover later), telemetry, logging, and rate limiting. You get significantly more functionality by using these official Microsoft libraries than by coding everything manually and trying to serialize JSON yourself.
Let's look at how to set up this architecture.
Understanding the Ecosystem
Before we write code, it is worth looking at the ecosystem. On the Microsoft documentation, you can see the IChatClient interface. This is the most important thing to know about for this post.
If you remember previous examples where we created an OpenAI service, this interface standardizes that functionality. In this post, we are setting up the boilerplate to eventually pull in implementations for OpenAI, Gemini, and Claude, but we will use the same IChatClient interface to create our actual agent application.
The main method you will interact with is GetResponseAsync, which handles the chat completion calls.
Project Setup and Packages
Let's go ahead and create a new console application. I am using .NET 10 for this example. Once you have your Program.cs ready, there are a couple of NuGet packages we need to add.
You will need to add Microsoft.Extensions.AI and, like in previous examples, we are going to use dotenv.net to read our environment variables.
Run the following commands in your terminal:
dotnet add package Microsoft.Extensions.AI
dotnet add package dotenv.net
Next, create a .env file in your project root. This is where we will be storing all of our API keys. In later posts, I will demonstrate where to get an API key for each provider as we implement them one at a time, but eventually, your file will look something like this:

OPENAI_API_KEY=...
CLAUDE_API_KEY=...
GEMINI_API_KEY=...
The first thing we need to do in our Program.cs is import the packages and load these variables.
using dotenv.net;
using Microsoft.Extensions.Hosting;

DotEnv.Load();
This DotEnv.Load() call ensures that you will be able to access your keys via System.Environment.GetEnvironmentVariable when we create our service classes.
Handling Command Line Arguments
We want this to be a completely provider-agnostic agent. It should work with OpenAI, Anthropic Claude, and Google Gemini. The way you are going to control this is through command-line arguments.
When you run the application, you will be able to pass in a provider argument to specify which backend to use, and a model argument to specify the specific model version (like Gemini Flash 2.0 or GPT-4o).
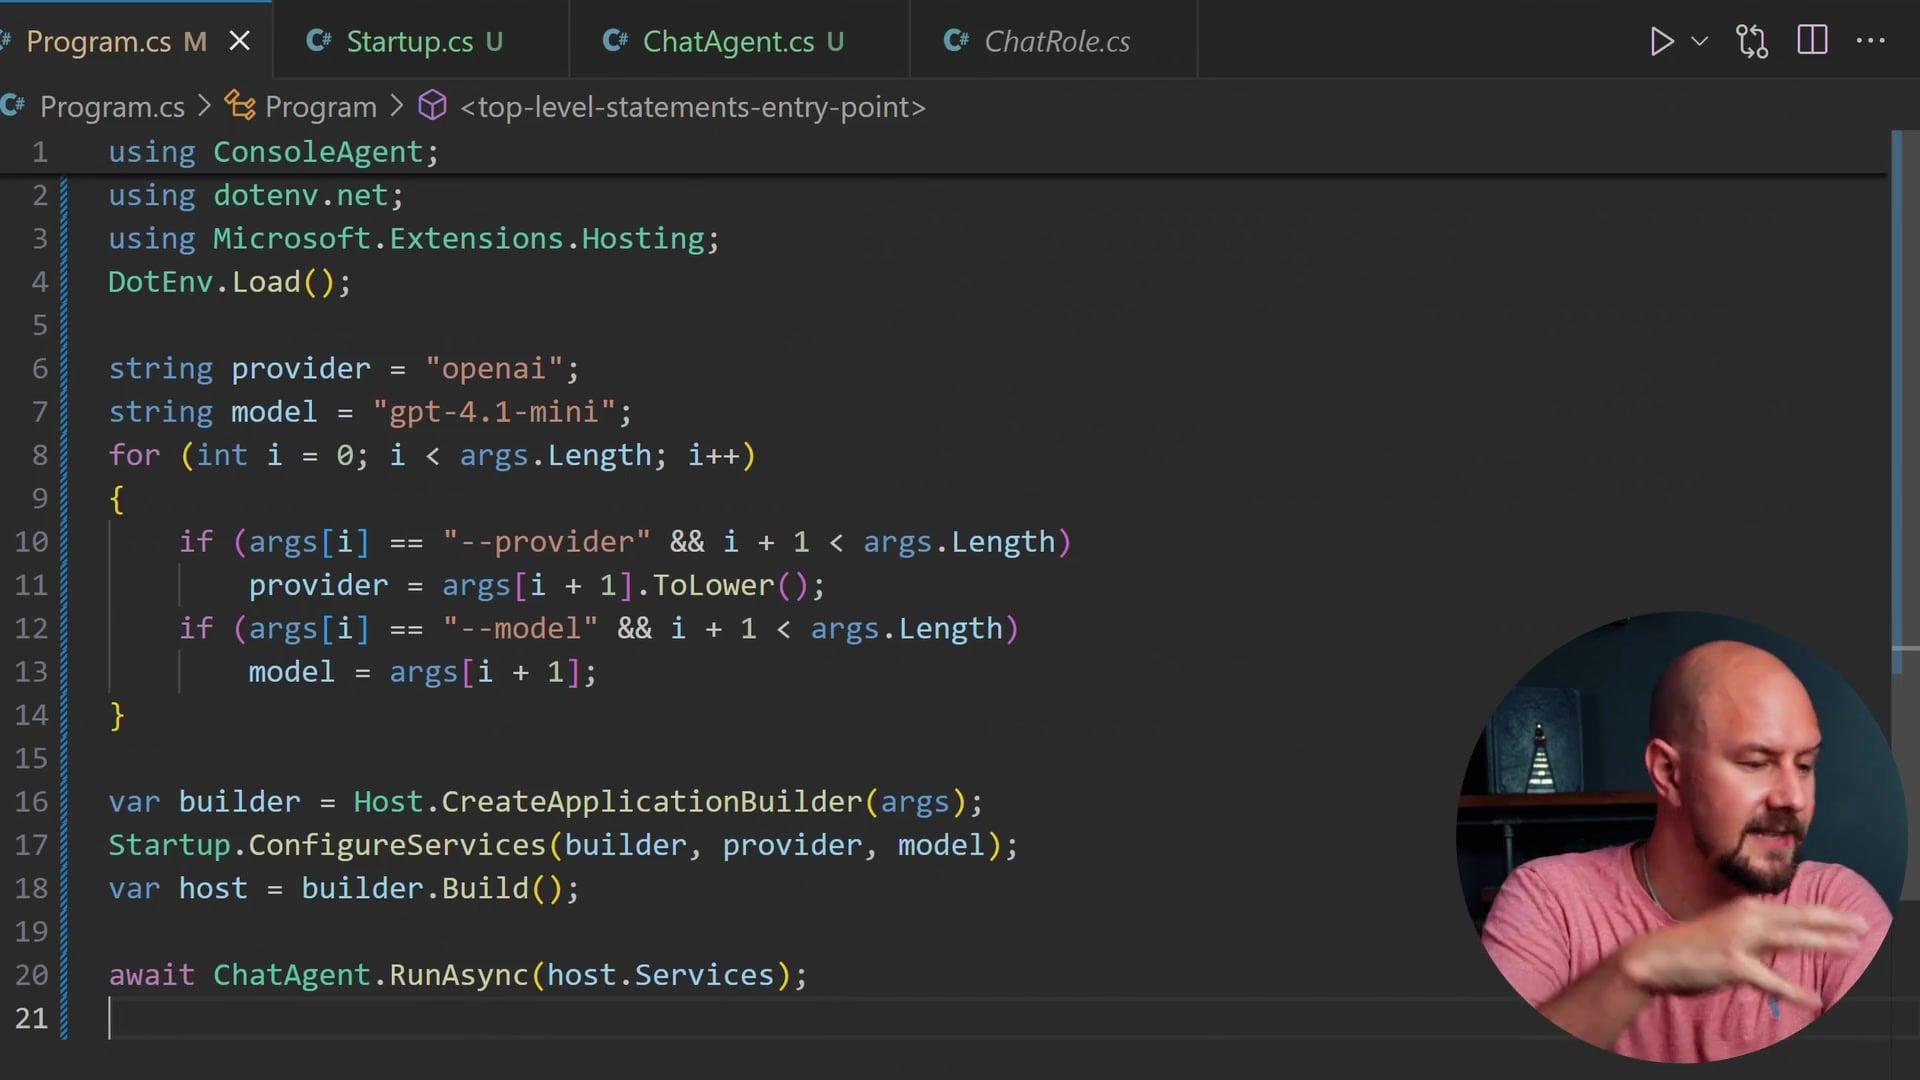
We need to start by reading those arguments in Program.cs. We will set some defaults so the application runs even without arguments.
string provider = "openai";
string model = "gpt-4.1-mini";

for (int i = 0; i < args.Length; i++)
{
    if (args[i] == "--provider" && i + 1 < args.Length)
        provider = args[i + 1].ToLower();
    if (args[i] == "--model" && i + 1 < args.Length)
        model = args[i + 1];
}
This boilerplate allows you to run commands like dotnet run --provider gemini to switch models instantly. This is the only place in the code where that switch logic needs to happen.
Setting Up Dependencies
We are not going to use "full-on" dependency injection because this is a simple console application, but we are going to create our dependencies in one place. We want one file that builds all the chat clients and services.
To do this, we will use a builder pattern. Since we are using .NET 10, we can use Host.CreateApplicationBuilder.
var builder = Host.CreateApplicationBuilder(args);
To keep our Program.cs clean, let's create a new file called Startup.cs. This file will contain the code that builds all instances of our services.
Inside Startup.cs, we will create a static class with a ConfigureServices method.
using Microsoft.Extensions.DependencyInjection;
using Microsoft.Extensions.Logging;
using Microsoft.Extensions.Hosting;

namespace ConsoleAgent;

public static class Startup
{
    public static void ConfigureServices(HostApplicationBuilder builder, string provider, string model)
    {
        builder.Services.AddLogging(logging => logging.AddConsole().SetMinimumLevel(LogLevel.Information));

        builder.Services.AddSingleton<ILoggerFactory>(sp =>
            LoggerFactory.Create(builder => builder.AddConsole().SetMinimumLevel(LogLevel.Information)));
    }
}
In this method, we are adding logging to our service collection. This setup means that at any point in our application, we can pull out an instance of ILoggerFactory to log information to the console.
We are essentially using a Service Locator pattern here. While this isn't always the "best practice" for large web applications, it is perfectly acceptable for this use case. We will pass this service provider around, and if our classes need a service, they can pull it out at runtime. It is dependencies without the strict constructor injection.
Creating the Chat Agent Loop
The next step is to create the actual ChatAgent. This class will handle the agent loop, creating messages, storing the message history, and communicating with the AI.
If you followed previous examples, you might remember we created a while(true) loop that read from the console and sent arrays to the API. This ChatAgent will perform the same function but using the Microsoft.Extensions.AI abstractions.
Create a ChatAgent.cs file:

using Microsoft.Extensions.AI;
using Microsoft.Extensions.DependencyInjection;
namespace ConsoleAgent;
public static class ChatAgent
{
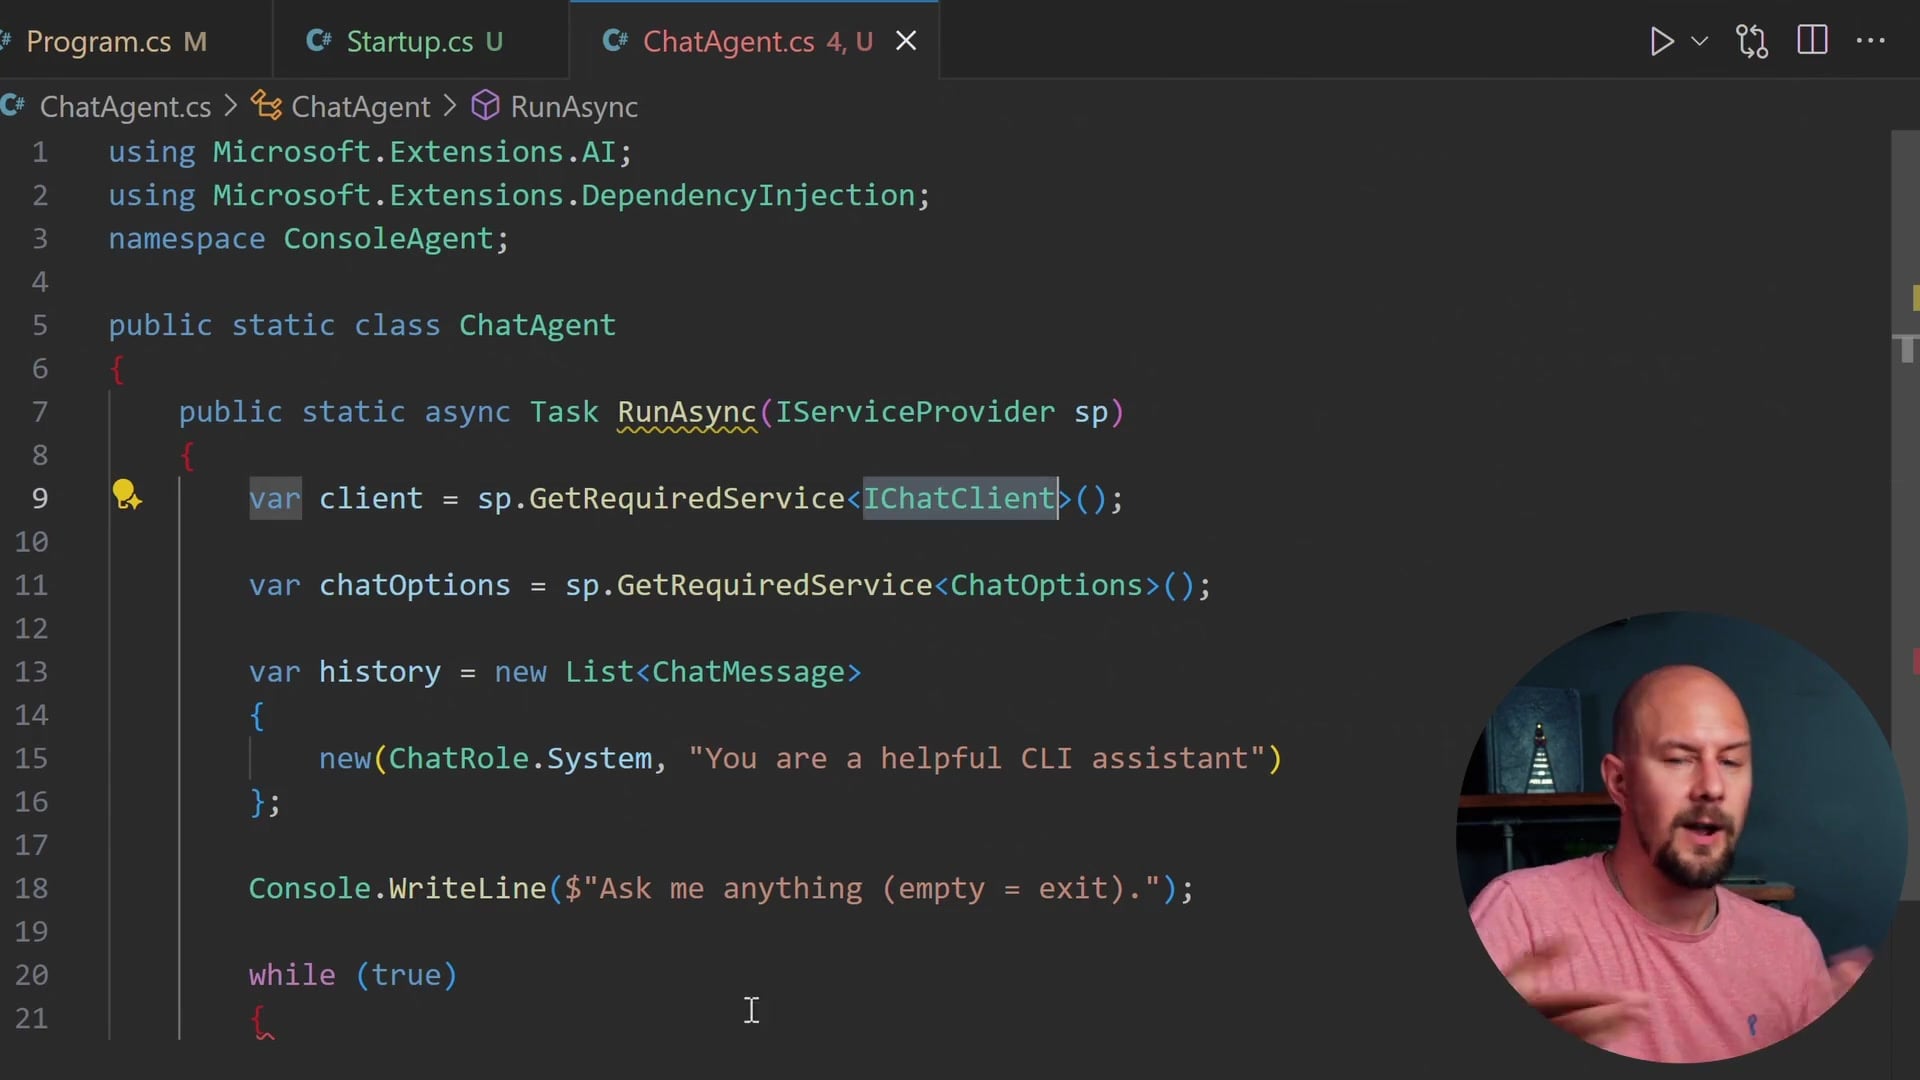
public static async Task RunAsync(IServiceProvider sp)
{
var client = sp.GetRequiredService<IChatClient>();
var chatOptions = sp.GetRequiredService<ChatOptions>();
var history = new List<ChatMessage>
{
new(ChatRole.System, "You are a helpful CLI assistant")
};
Console.WriteLine($"Ask me anything (empty = exit).");
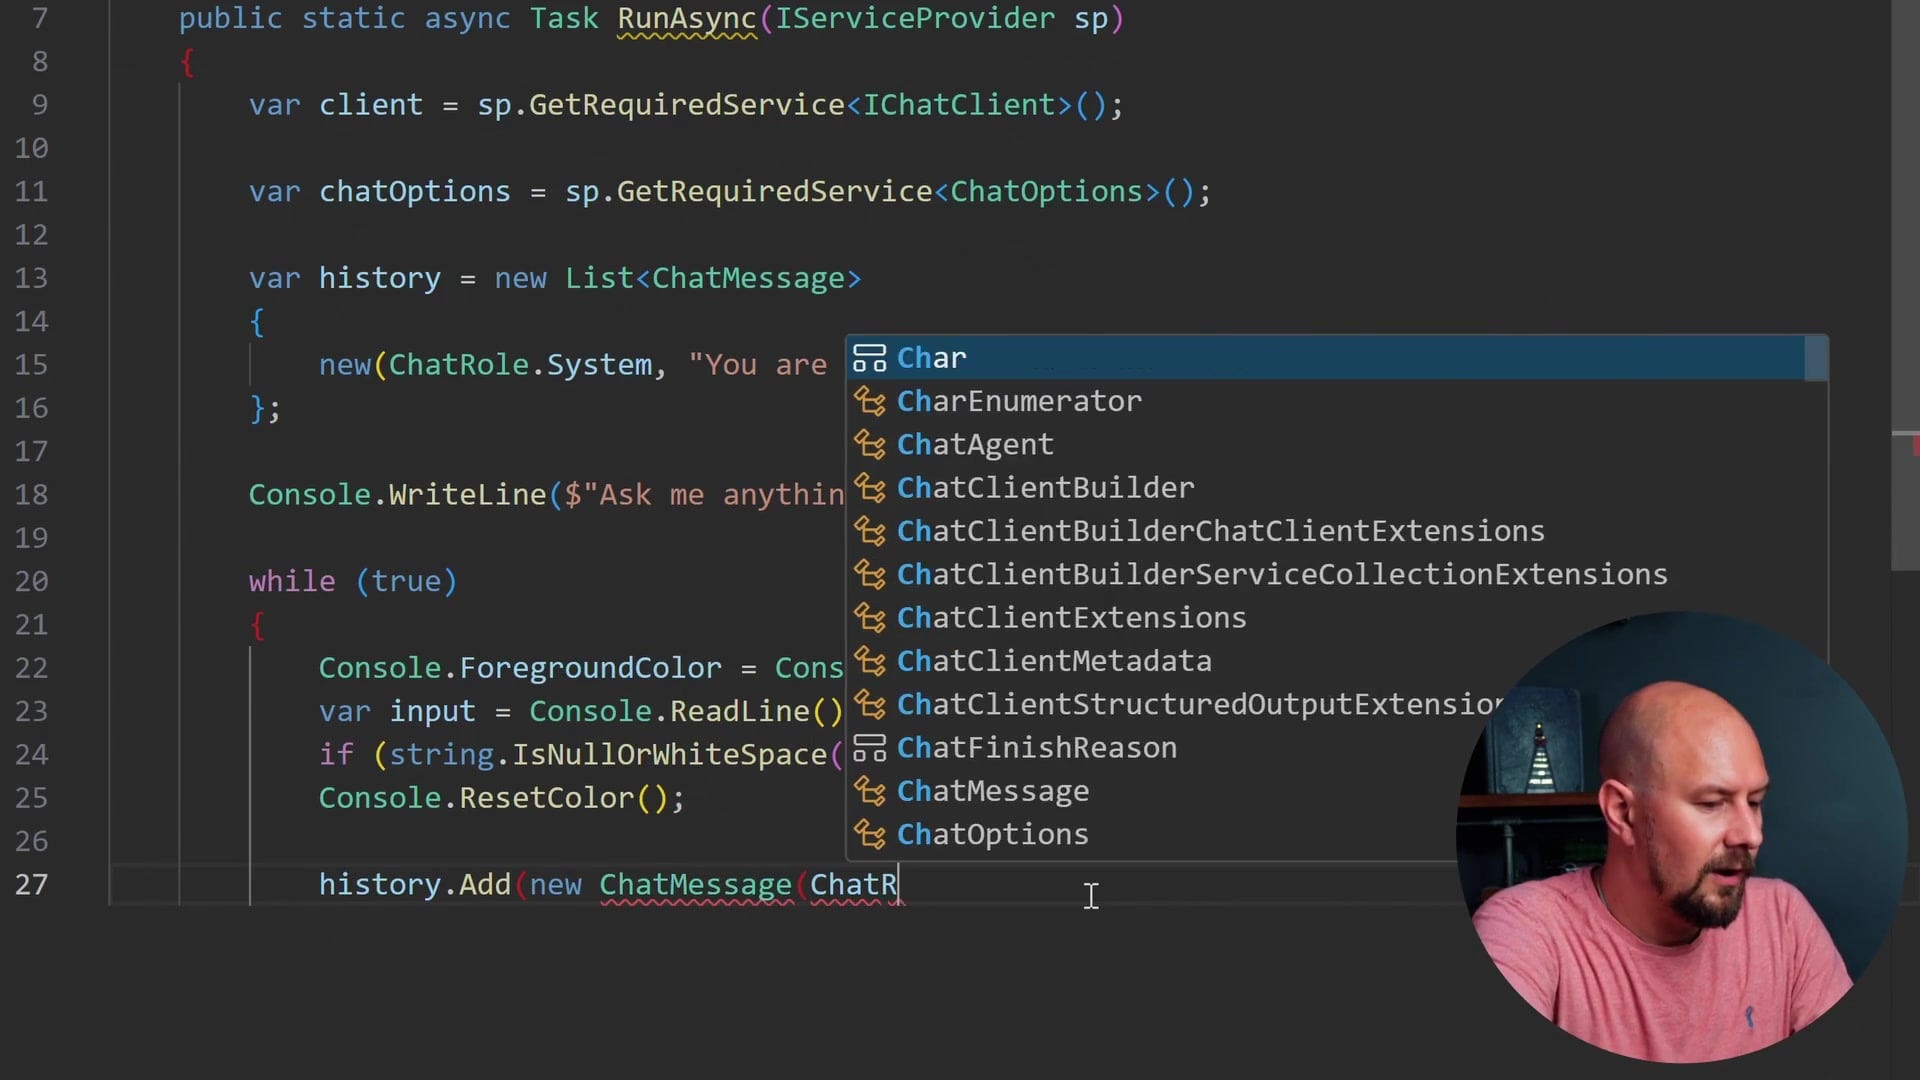
while (true)
{
Console.ForegroundColor = ConsoleColor.Blue;
var input = Console.ReadLine();
if (string.IsNullOrWhiteSpace(input)) break;
Console.ResetColor();
history.Add(new ChatMessage(ChatRole.User, input));
var response = await client.GetResponseAsync(history, chatOptions);
Console.WriteLine(response.Text);
history.AddRange(response.Messages);
}
}
}
Breaking Down the Agent Logic
There are several important things happening in this code:
- Service Retrieval: We pull the
IChatClientandChatOptionsfrom the service provider (sp). Note that we haven't implemented the specificIChatClientinStartup.csyet—we will do that when we add specific providers like OpenAI or Gemini. - Chat History: We maintain a
List<ChatMessage>. TheChatMessageclass comes directly fromMicrosoft.Extensions.AI. - System Prompt: We initialize the history with a
ChatRole.Systemmessage defining the assistant's persona. - The Loop: We enter an infinite loop that waits for user input.
- User Input: We color the user's input blue for better readability. If the input is empty, we
breakthe loop to exit the application. - Sending Requests: We add the user's message to the history with
ChatRole.Userand then callclient.GetResponseAsync.
Crucially, we pass the entire history to the AI with every call. As the conversation progresses, this list grows. Later, we can look at summarizing this history if it gets too long, but for now, sending the full context is necessary for the LLM to "remember" the conversation.
When the response comes back, we write response.Text to the console and add the response messages back into our history so the context is preserved for the next turn.
Final Wiring in Program.cs
Now that our components are built, we need to wire them up in Program.cs.
We need to call our configuration method, build the host, and then run the agent.
// ... args parsing code from earlier ...

var builder = Host.CreateApplicationBuilder(args);
Startup.ConfigureServices(builder, provider, model);
var host = builder.Build();

await ChatAgent.RunAsync(host.Services);
This is the complete boilerplate.
Recap
If you try to run this code right now, it will fail because we haven't actually registered an implementation of IChatClient in our Startup.cs yet. However, we have successfully established the architecture for a robust AI agent.
Here is what we have accomplished:
- Unified Interface: We are prepared to use
IChatClientto standardize interactions across any AI provider. - Provider Agnostic: We parsed command-line arguments to allow switching between OpenAI, Gemini, and Claude at runtime.
- Infrastructure: We set up a
HostApplicationBuilderto manage dependencies and logging, moving away from manual instantiation. - Agent Loop: We built a
ChatAgentthat handles the conversation flow, history management, and UI logic.
In the next post, we will start adding the actual AI providers to make this agent functional. We will implement the connections to OpenAI, Gemini, and Claude so you can talk to different AI models using this exact same codebase.
If you enjoyed this post, stay tuned for the implementation details coming up next. Thanks for reading.