
Getting Started: AI for .NET Developers
Get started with integrating AI into your .NET applications effectively using the latest LLM best practices.

If you find yourself copying and pasting code between your editor and an online AI assistant, you’re missing out on the full power that today’s AI development tools offer. There are plenty of choices out there, and it’s easy to feel overwhelmed. However, since agentic coding became possible, one tool has consistently risen above the rest: Claude Code.
This guide will walk you through how Claude Code works, how to install and configure it in your own codebase, and how to write prompts that produce accurate, helpful results.
Claude Code is an agentic coding tool from Anthropic that runs directly in your terminal. Unlike web-based chatbots, which require you to copy and paste code back and forth, Claude Code takes an agentic approach: it can act on your behalf. This means it reads files throughout your project, runs terminal commands, edits your source code, and manages Git workflows. This is all done from the command line, so you never have to leave your development environment.
While the AI reasoning itself happens on Anthropic’s servers, all file access and command execution take place locally on your machine. This means you can run Claude Code directly on your source code, and it will analyze your codebase to understand its structure and patterns before making any changes. Claude Code is available to all paid Claude subscribers and through the Anthropic API on a pay-per-use basis. Although most developers use it via the command line, you can also access Claude Code from the desktop app or within VS Code.
Before you install Claude Code, make sure your environment is set up. The tool supports all major operating systems. If you’re on Windows, you’ll need to install Git for Windows first. This is required before you proceed with the Claude Code installation.
You’ll also need either a paid Claude subscription or Anthropic API credits. Claude Code is included with all paid Claude plans, though your usage limits will depend on your subscription tier. Alternatively, you can use the Anthropic API directly, but you’ll need to make sure your account has enough API credits before you get started.
Finally, make sure you have a codebase ready to use. Any project will work, even a small side project or a sample repository is fine. At the end of this guide, you’ll try out some basic prompting techniques, so having a project on hand will help you follow along.
You’re ready to install Claude Code. Open up a new terminal window and paste the installation command for your specific operating system:
macOS, Linux, WSL:
curl -fsSL https://claude.ai/install.sh | bash
Windows PowerShell:
irm https://claude.ai/install.ps1 | iex
Windows CMD:
curl -fsSL https://claude.ai/install.cmd -o install.cmd && install.cmd && del install.cmd
The installation process only takes a few moments. When it finishes, you’ll see a message confirming that Claude Code has been installed successfully:
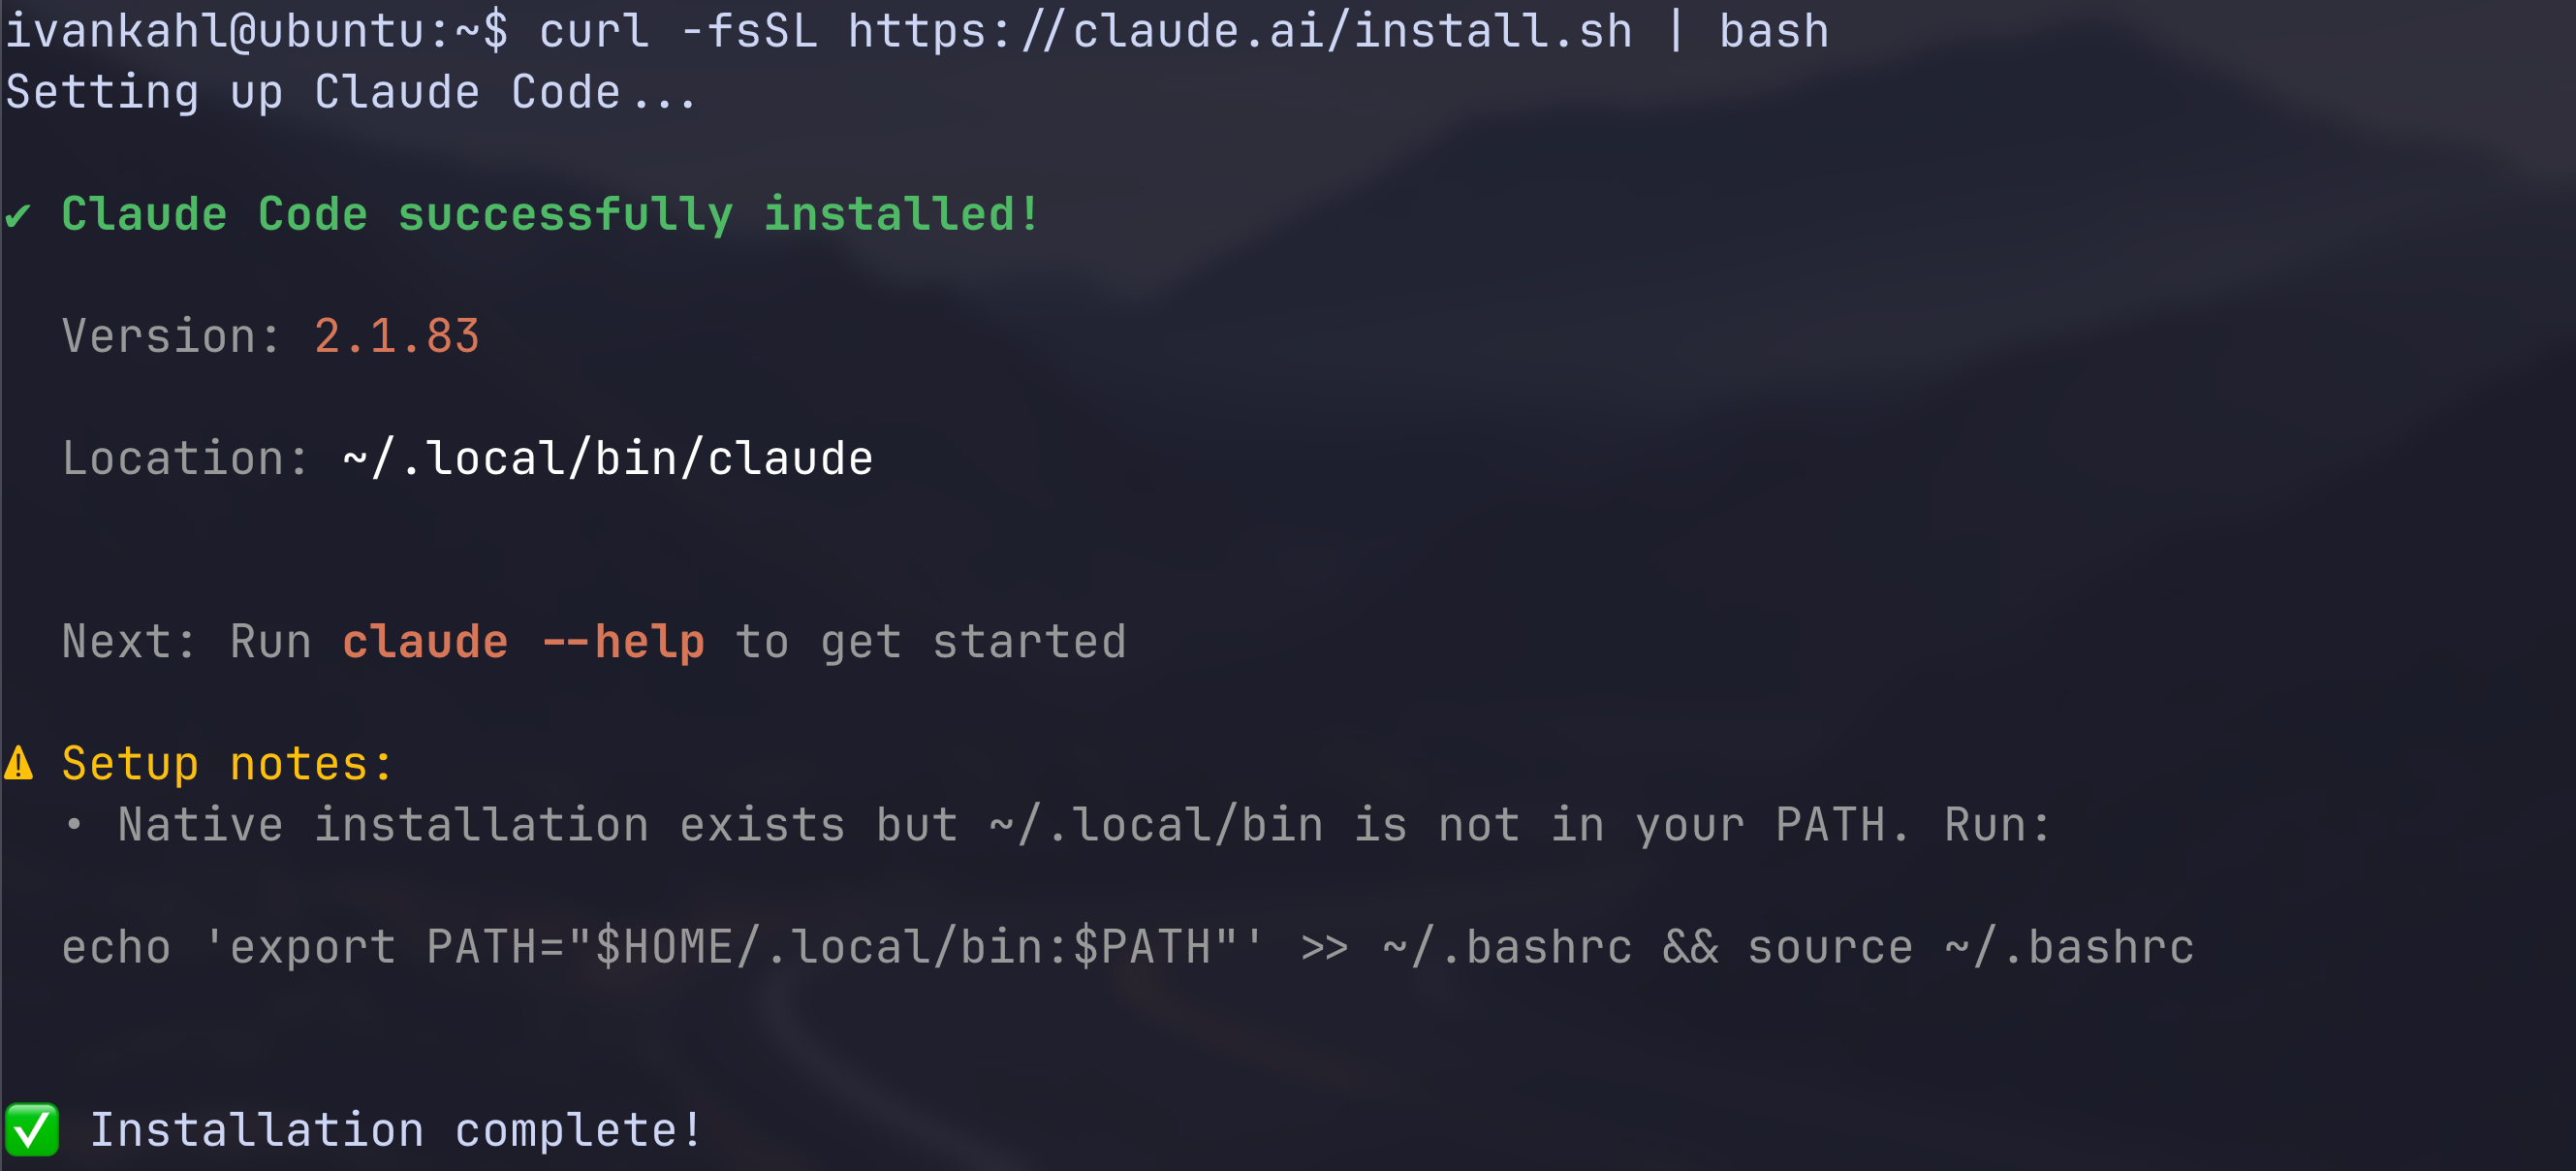
Depending on your operating system, you may need to add the Claude Code executable to your PATH. If that’s the case, just follow the instructions provided in the installation message to complete the setup.
After installing Claude Code, the next step is to authenticate it with your Claude account. The recommended approach is to use your existing Claude subscription, since this lets you take advantage of your current usage limits. You can also connect Claude Code to the Anthropic API directly, is also covered below. There are third-party provider options as well, but this guide will focus on the first two methods.
To start, open a terminal window and run the following command to open Claude Code:
claude
When you start Claude Code for the first time, you’ll be prompted to complete the initial setup. The first step is to choose the text style that works best with your terminal:
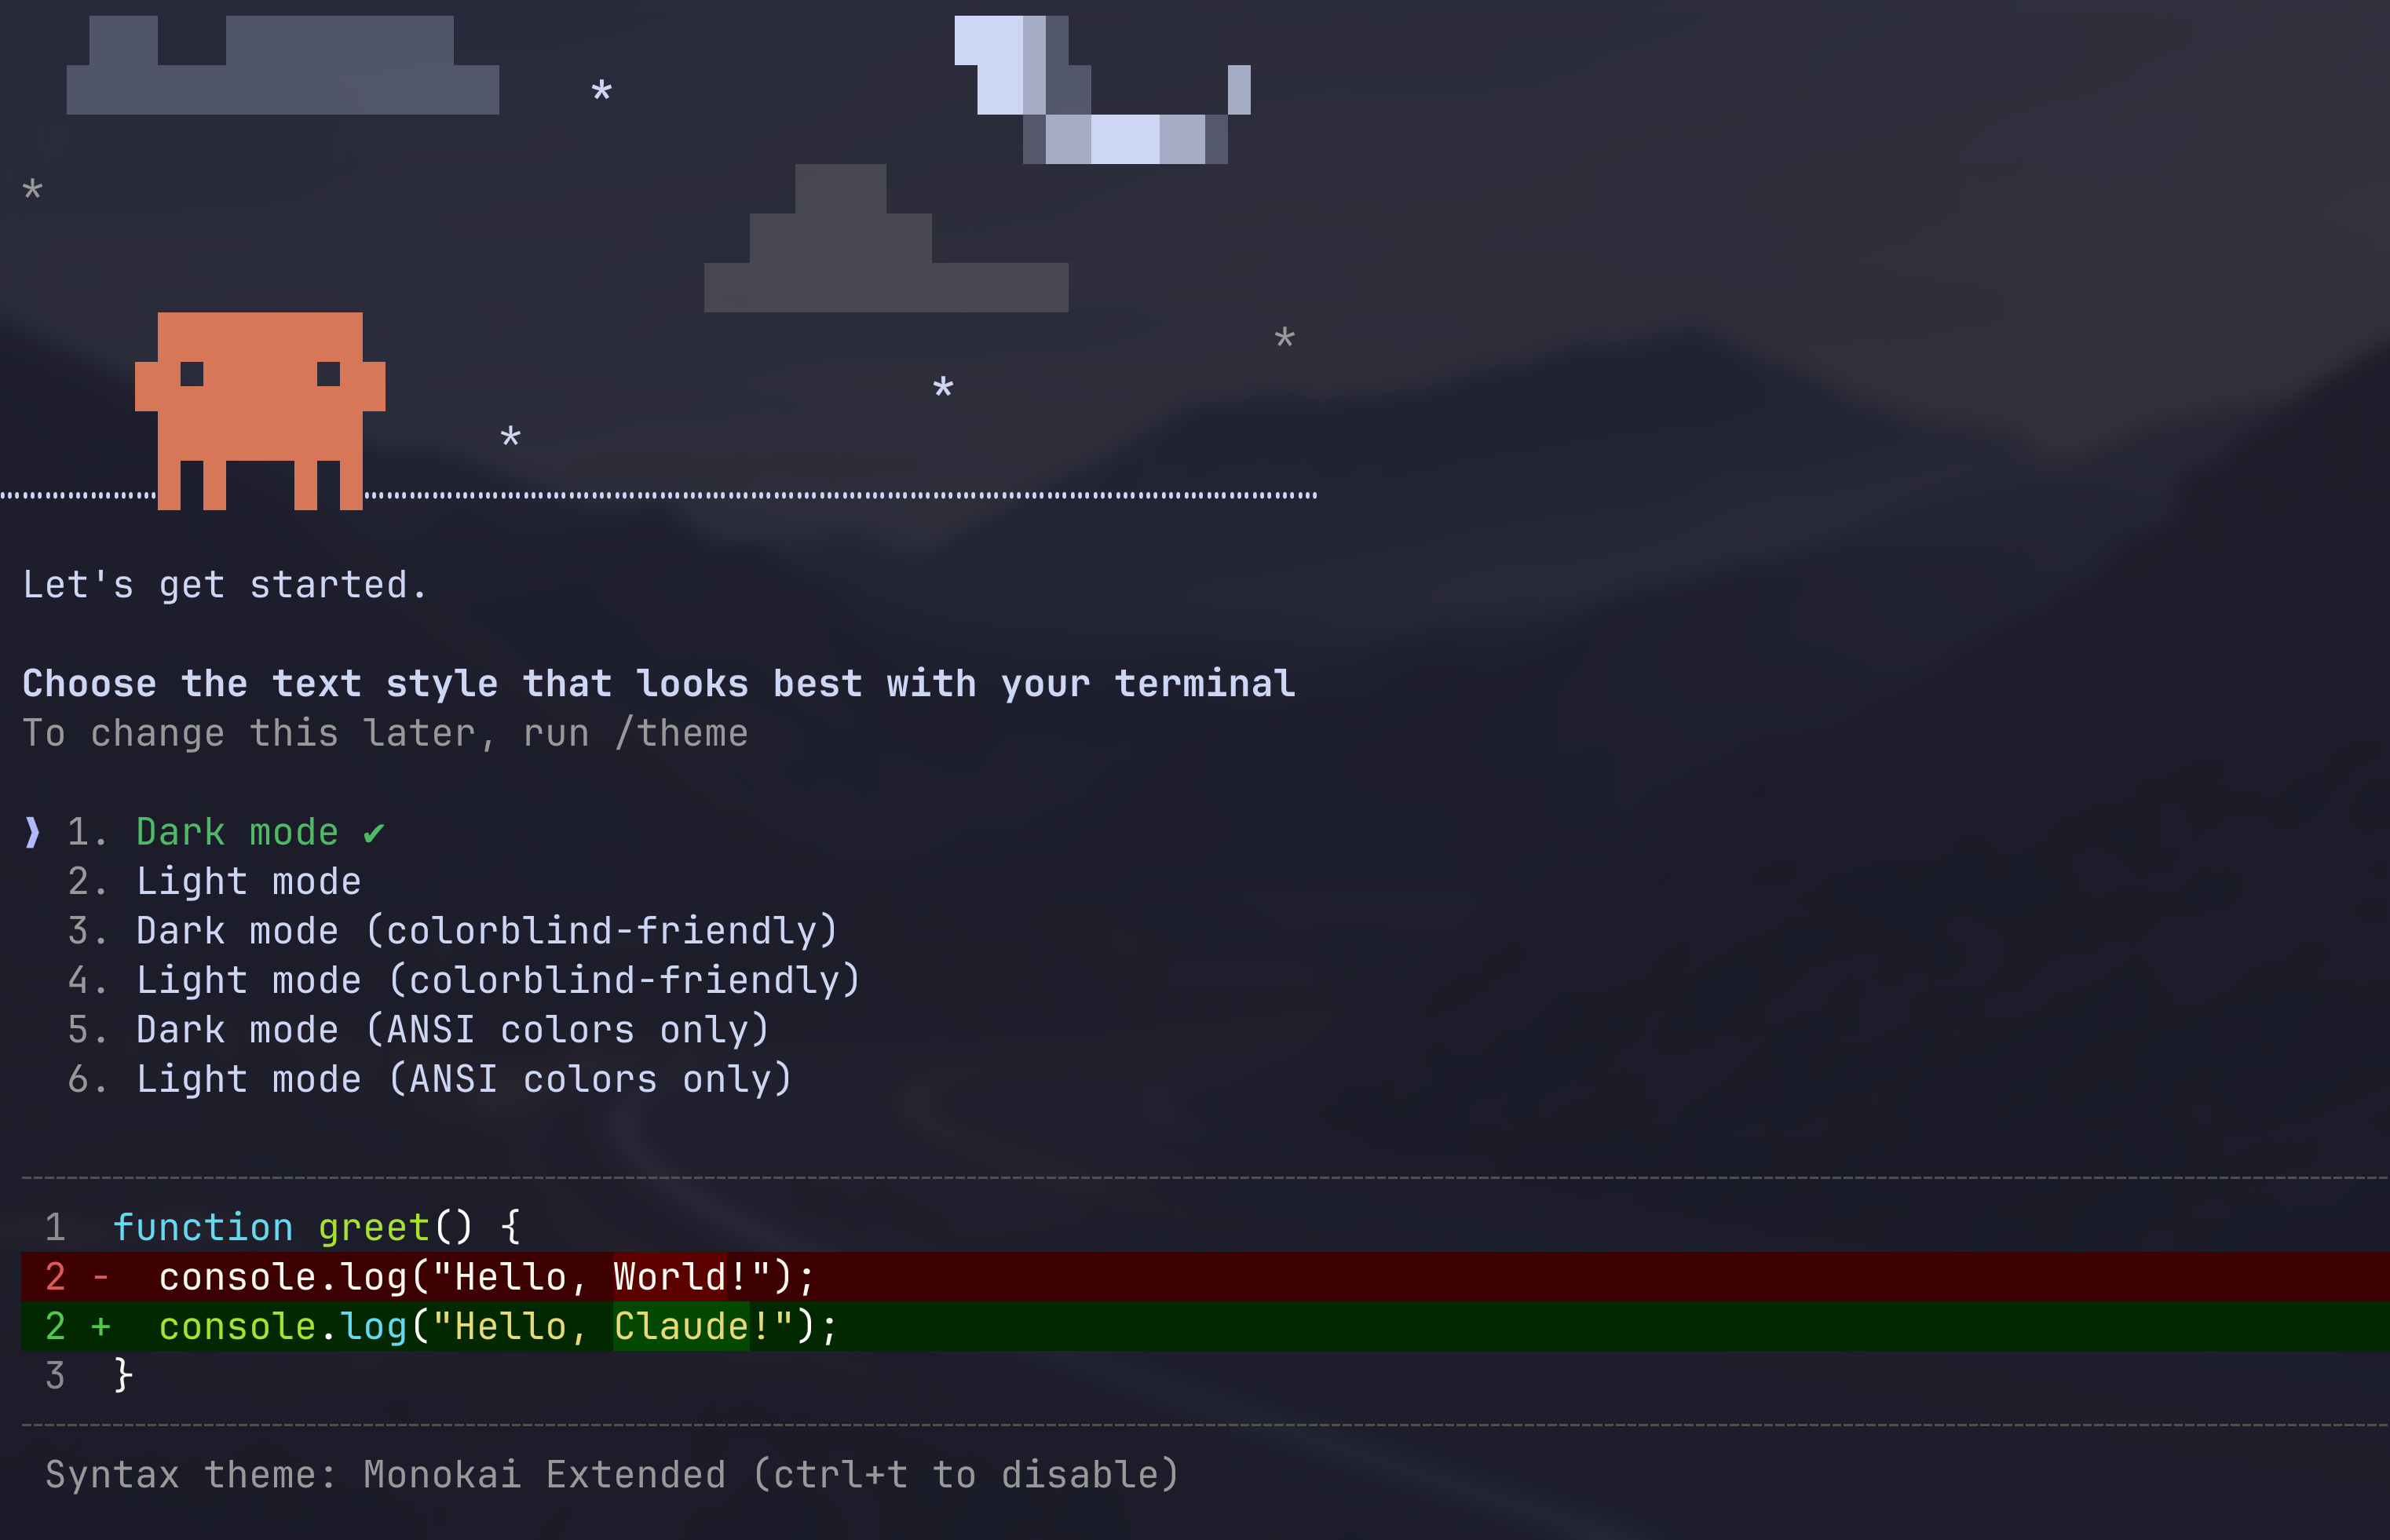
Once you’ve selected your preferred text style, press Enter to confirm. Next, you’ll be prompted to choose your login method.
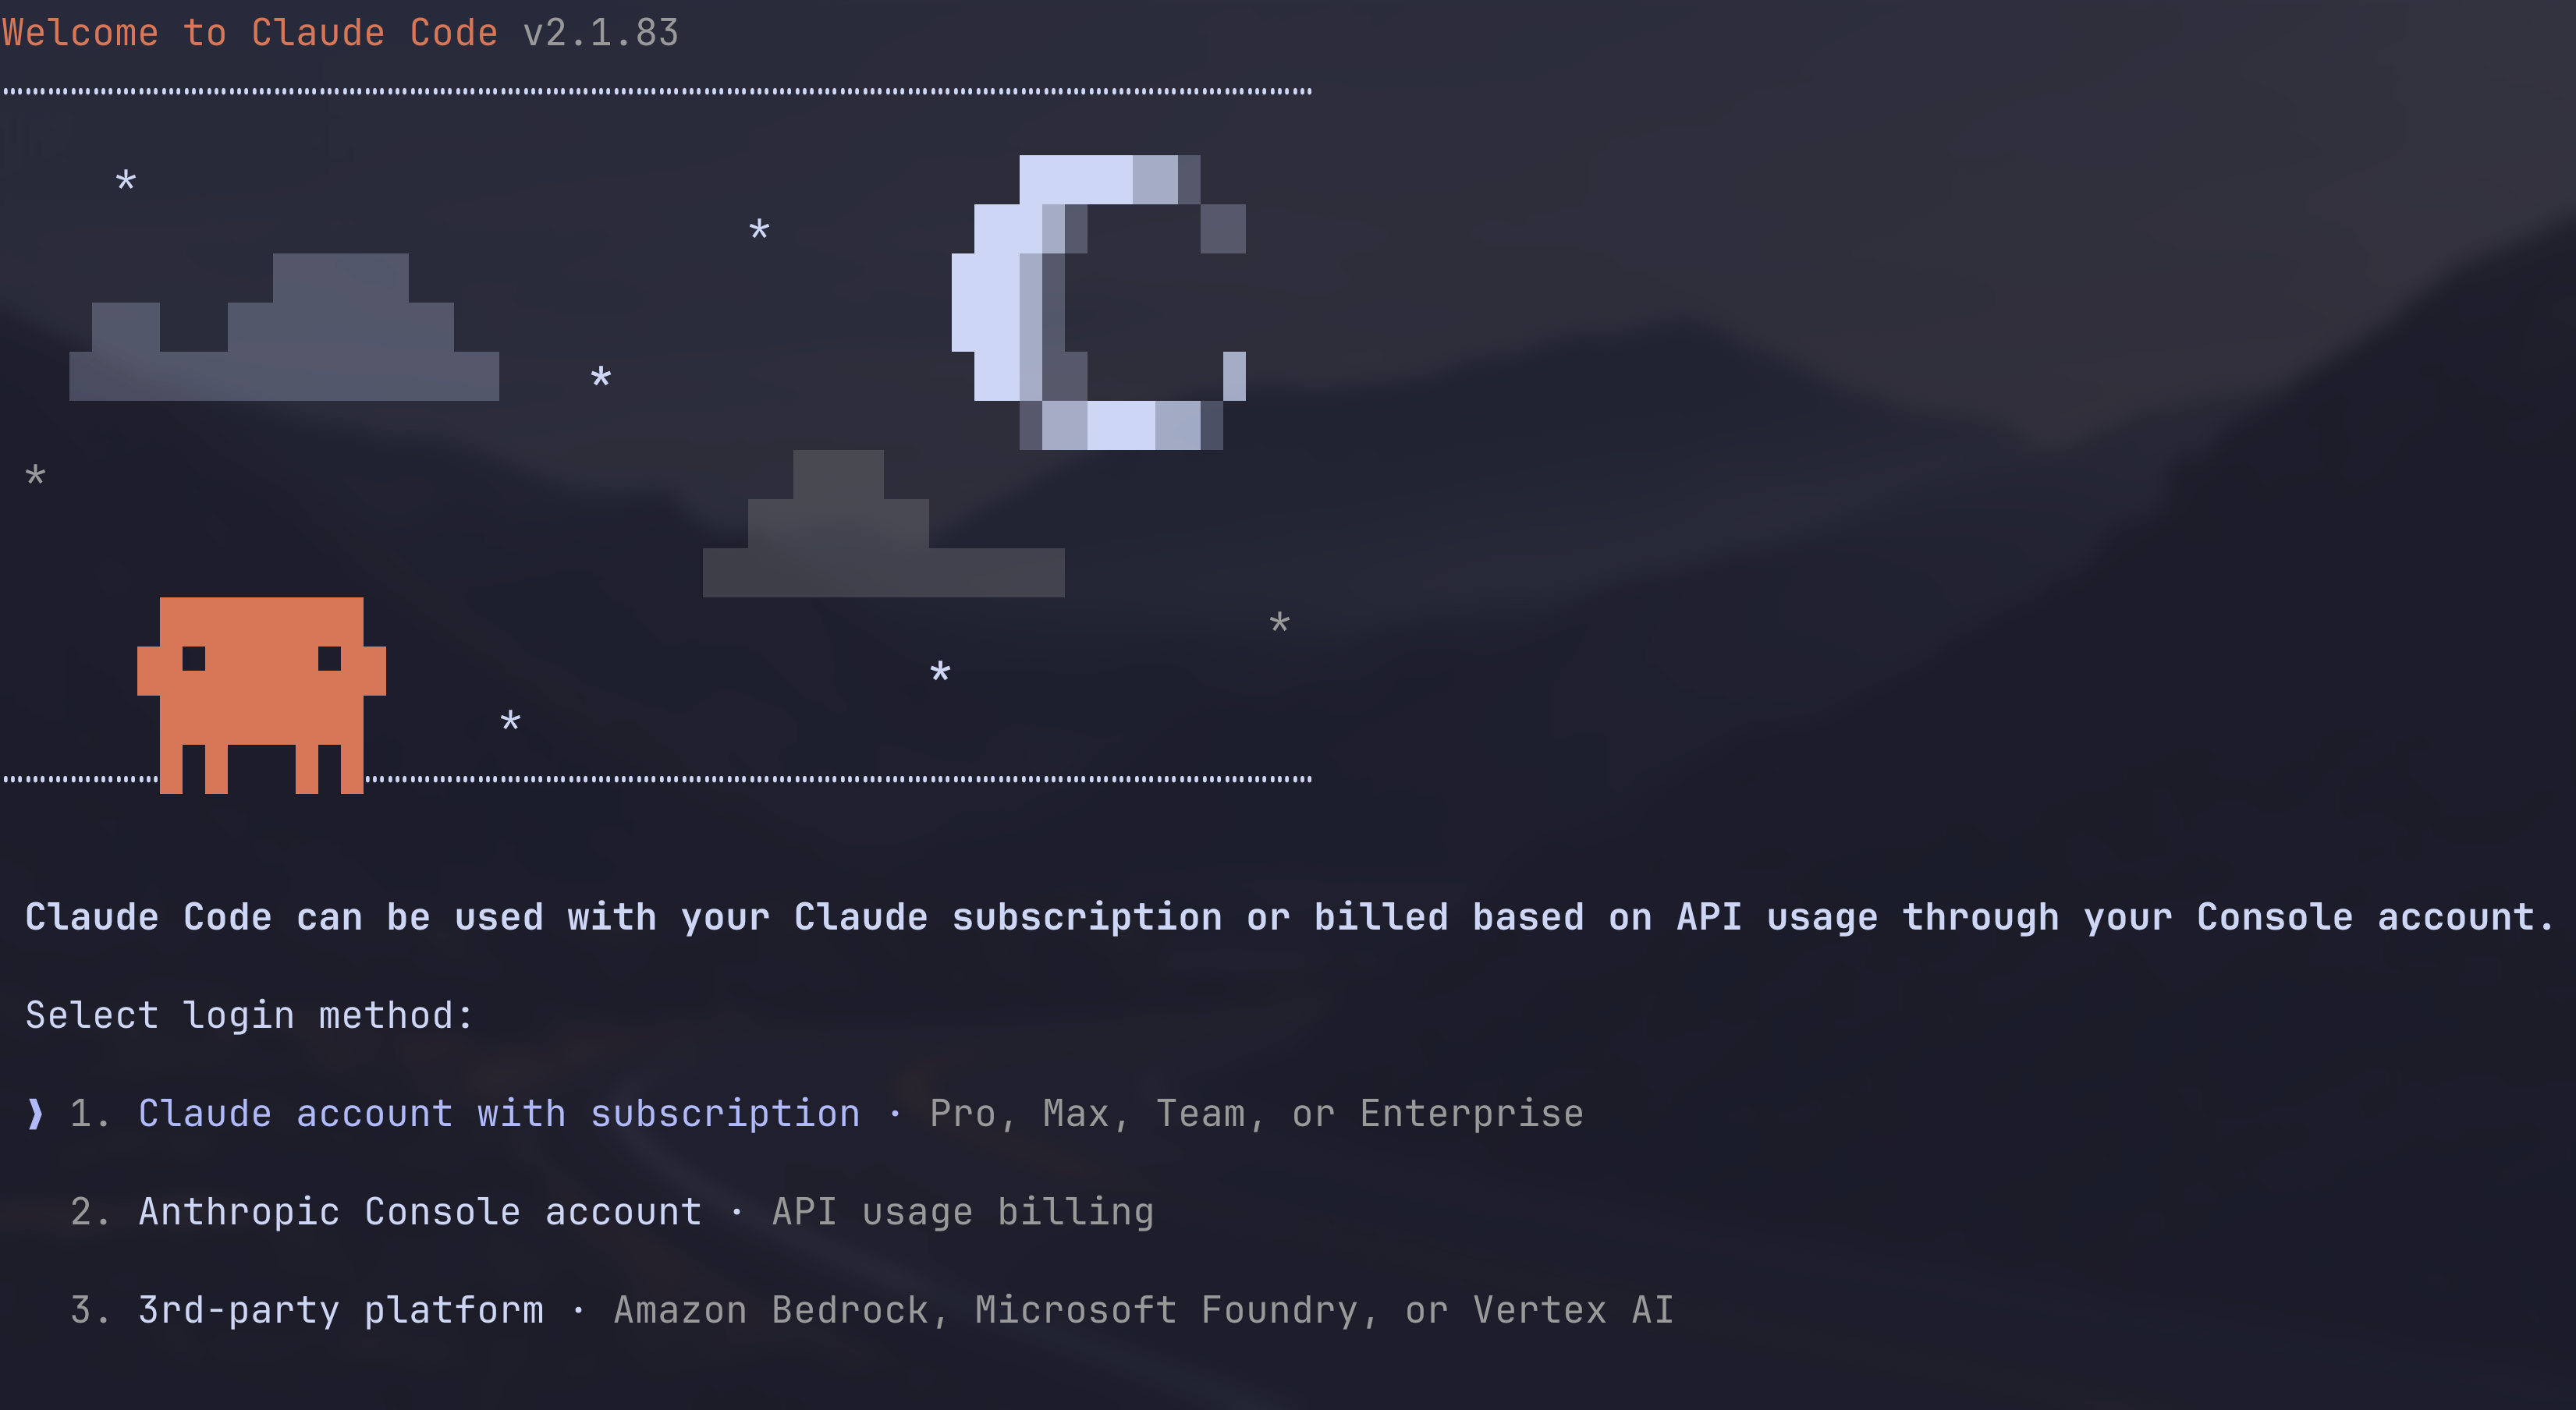
If you already have an active Claude subscription, you can use it with Claude Code. Keep in mind that Claude Code will count against your weekly and 5-hourly usage limits.
To continue, select 1. Claude account with subscription in the menu that appears.
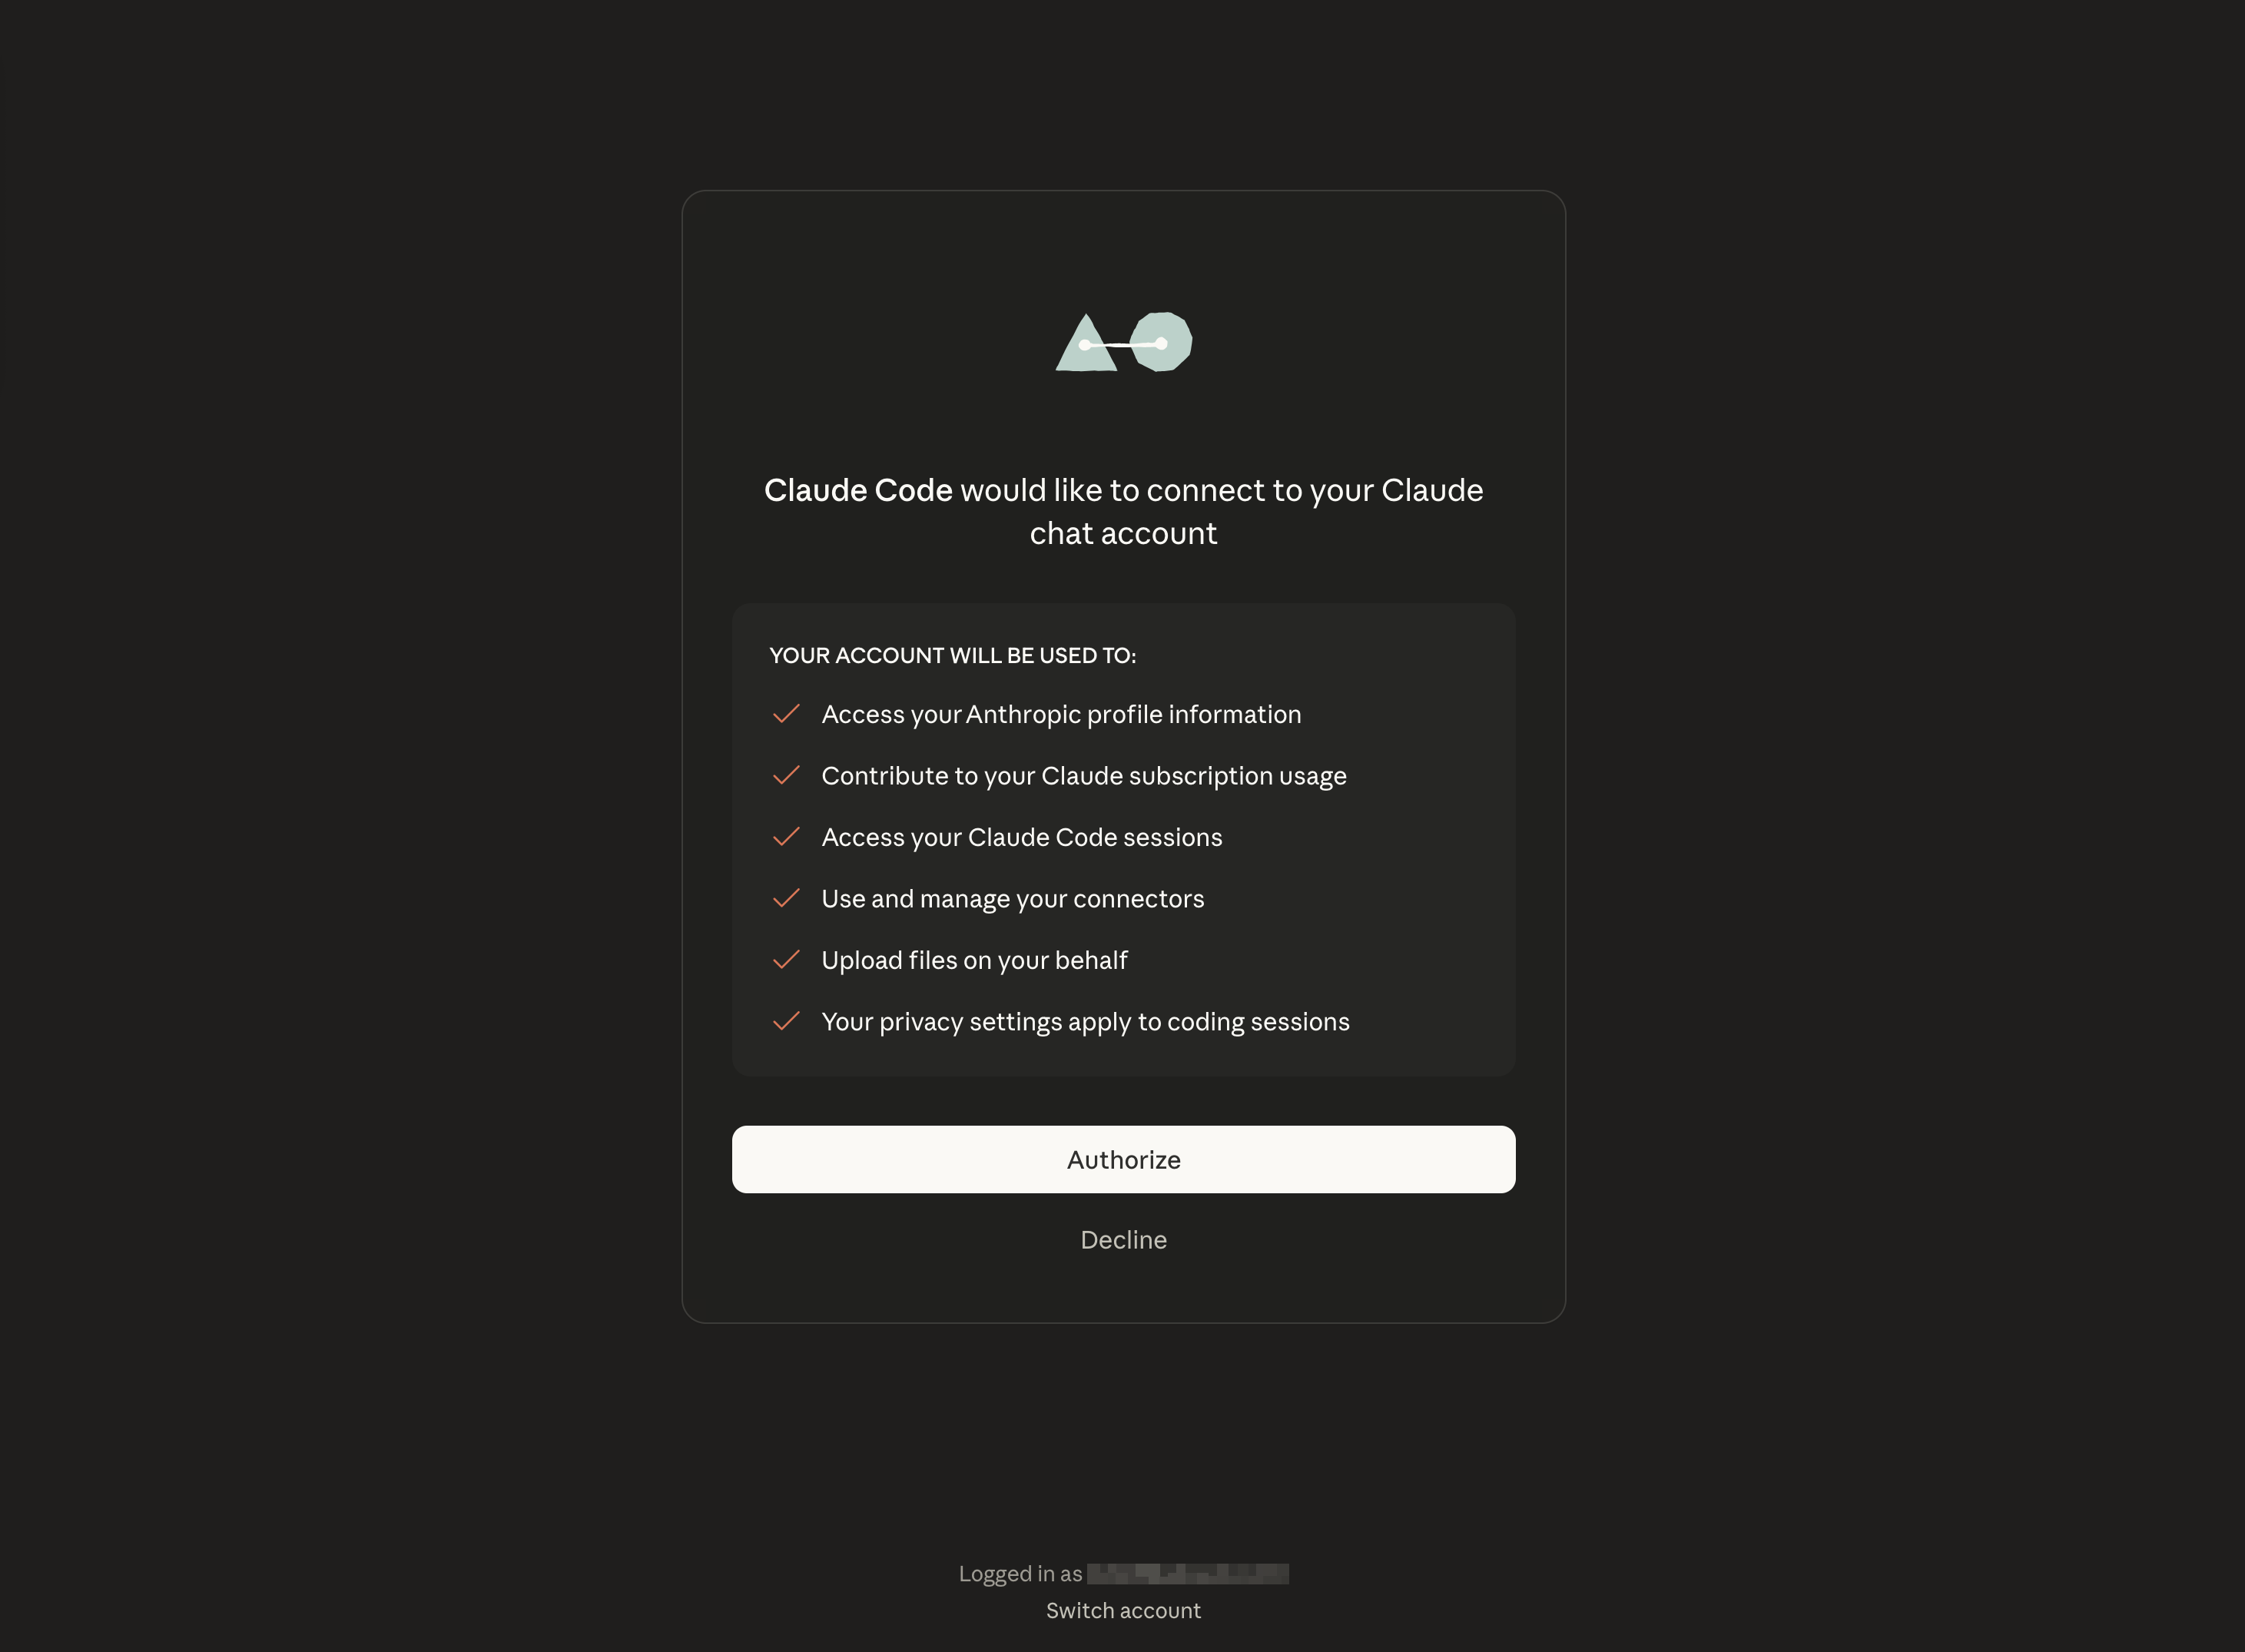
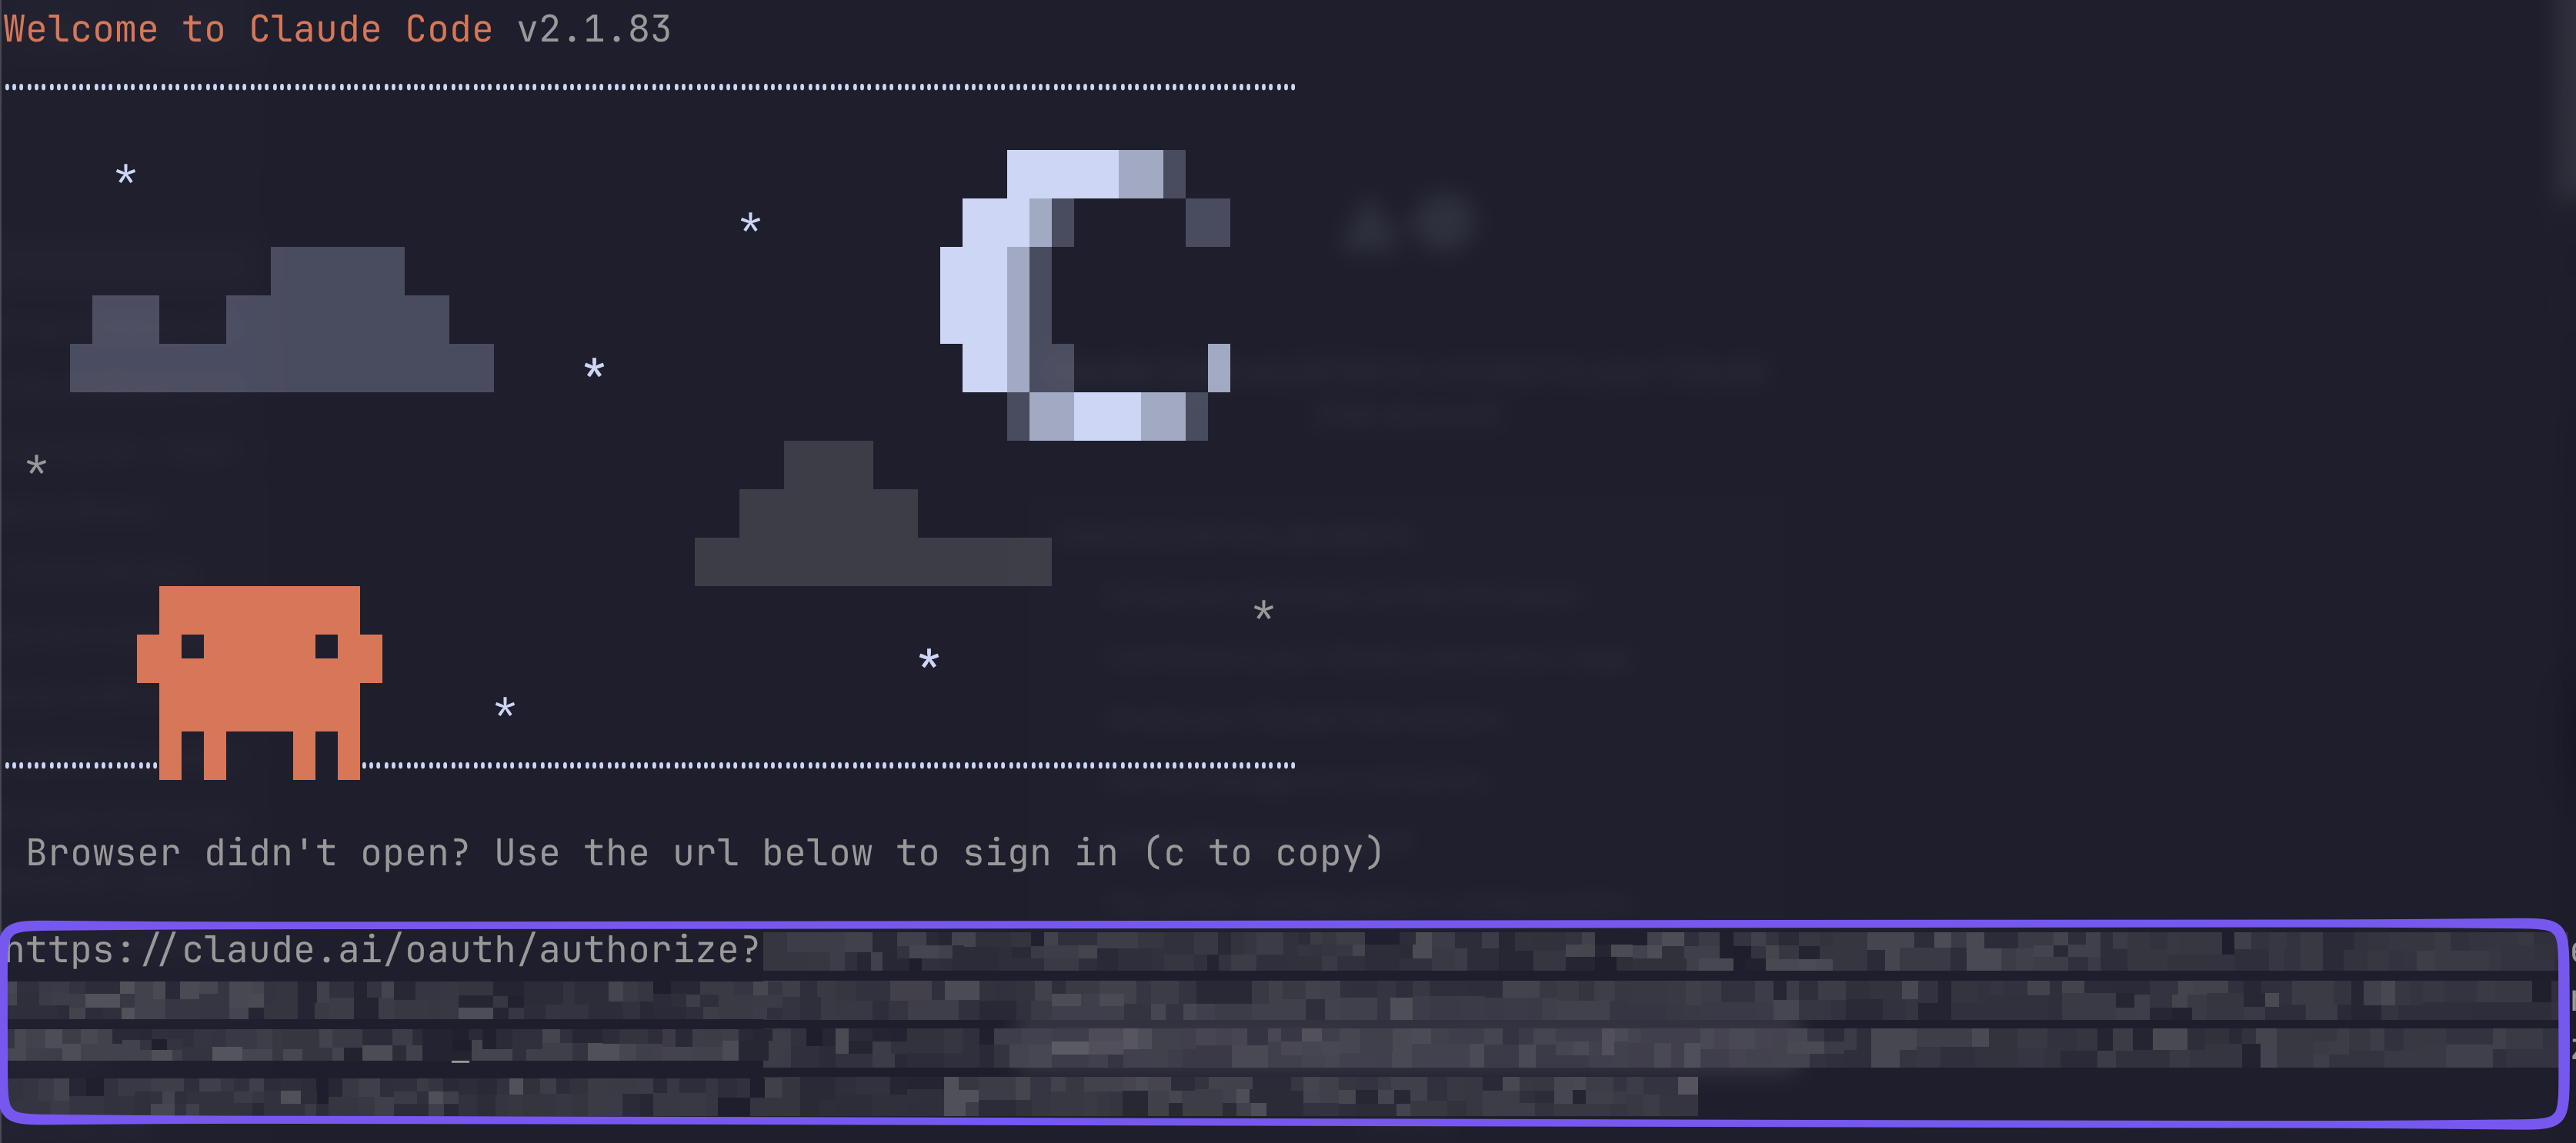
A browser window should open, with an authorization page asking if you’d like Claude Code to connect to your Claude account:
If the window doesn’t open, copy the link displayed in the terminal:
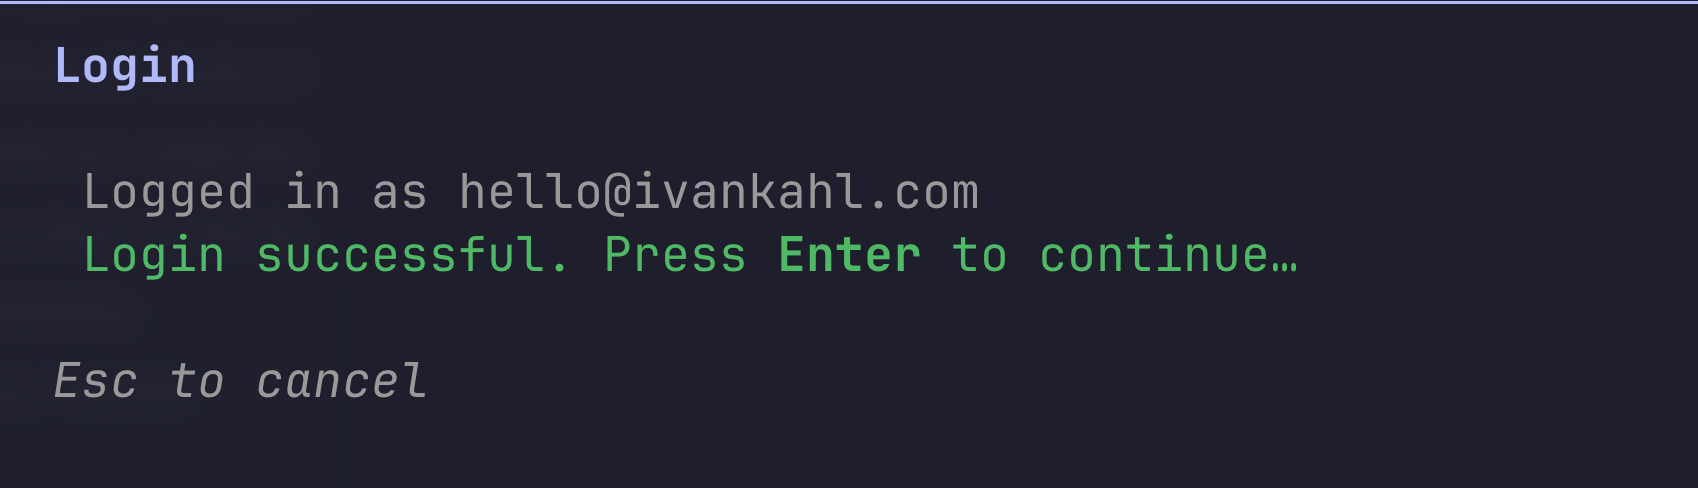
Once authorized, you should see a success webpage indicating you can close it. Your Claude Code should show you logged in now:
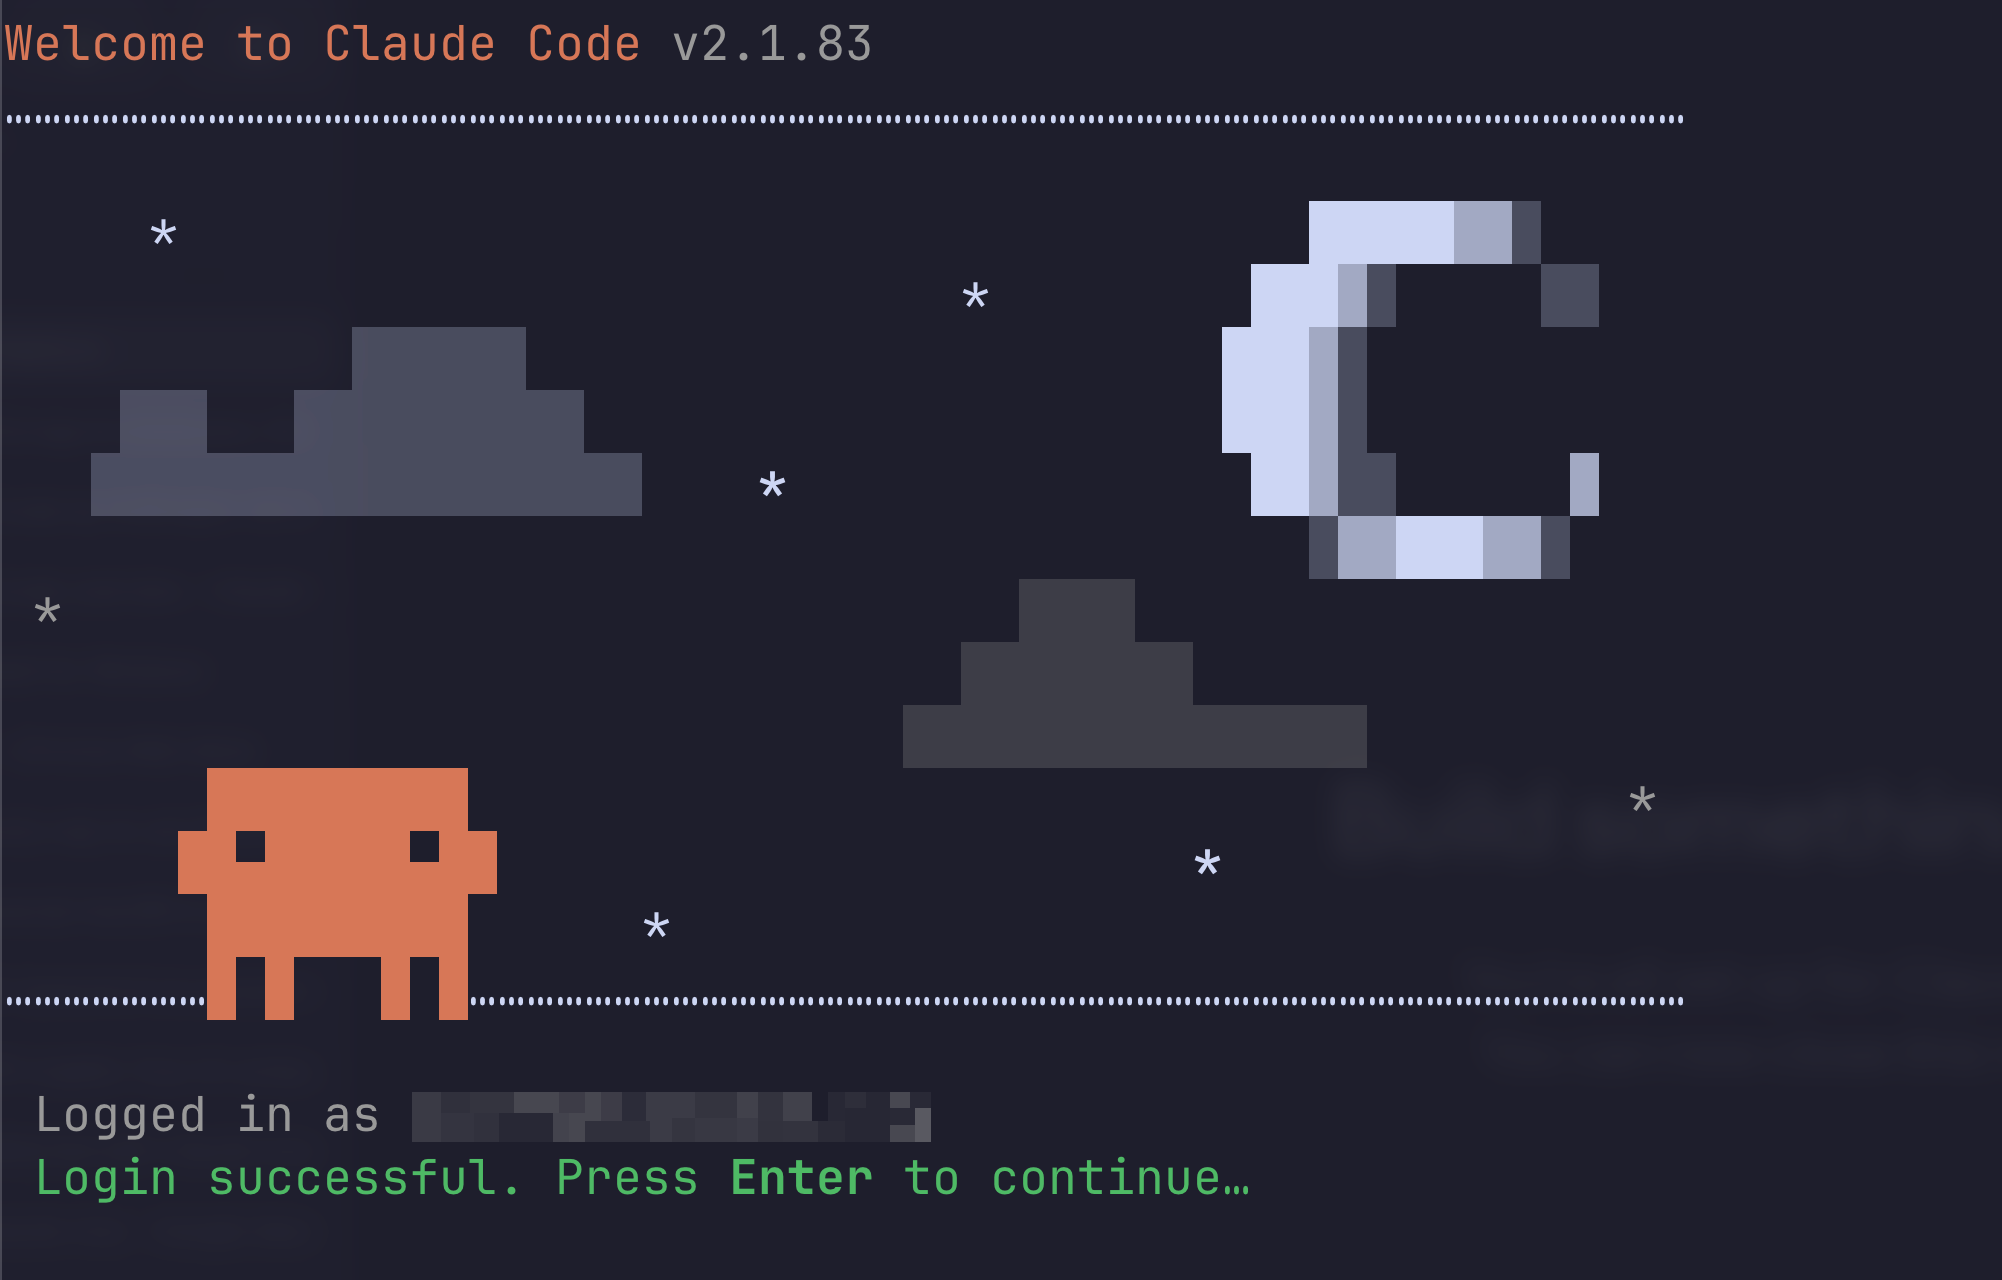
Press Enter to continue. Review the security notes that appear and press Enter again to acknowledge them.
At this point, you’re set up and ready to start using Claude Code in your own codebase. Let’s move on to the next section.
If you prefer using the Anthropic API instead, select 2. Anthropic Console account and press Enter.
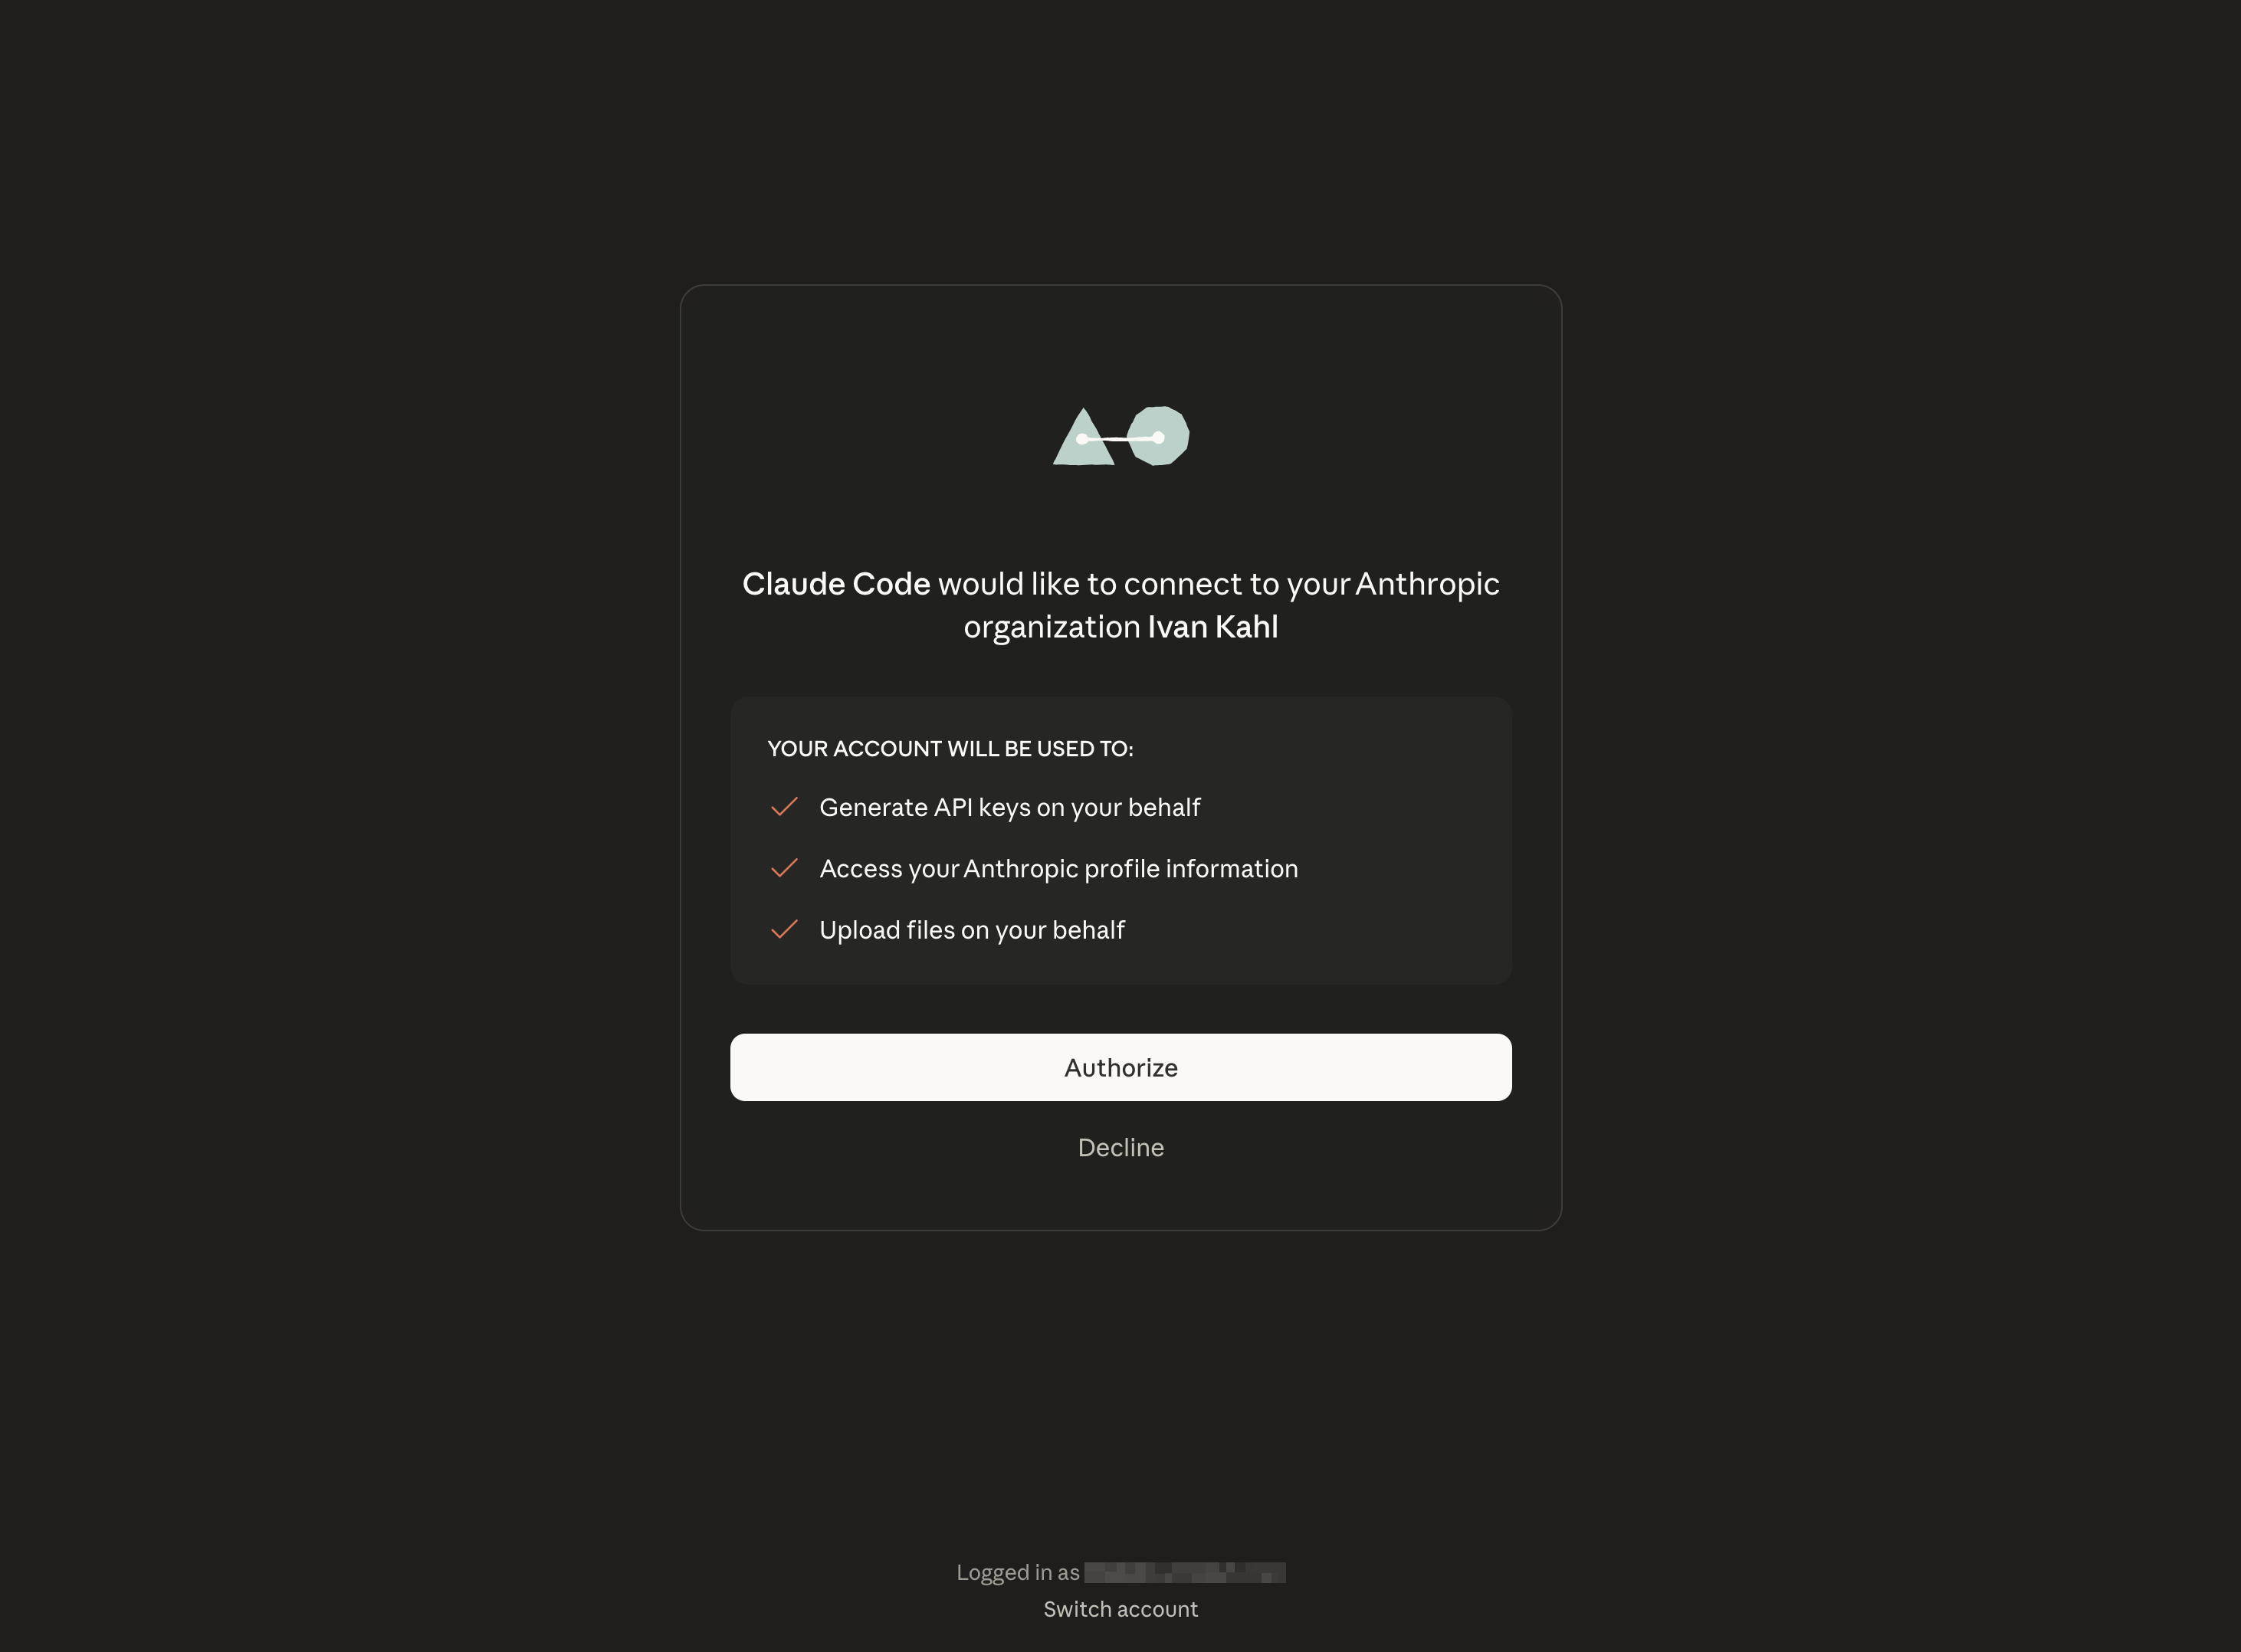
A browser window will appear and ask you to authorize Claude Code with your Anthropic account:
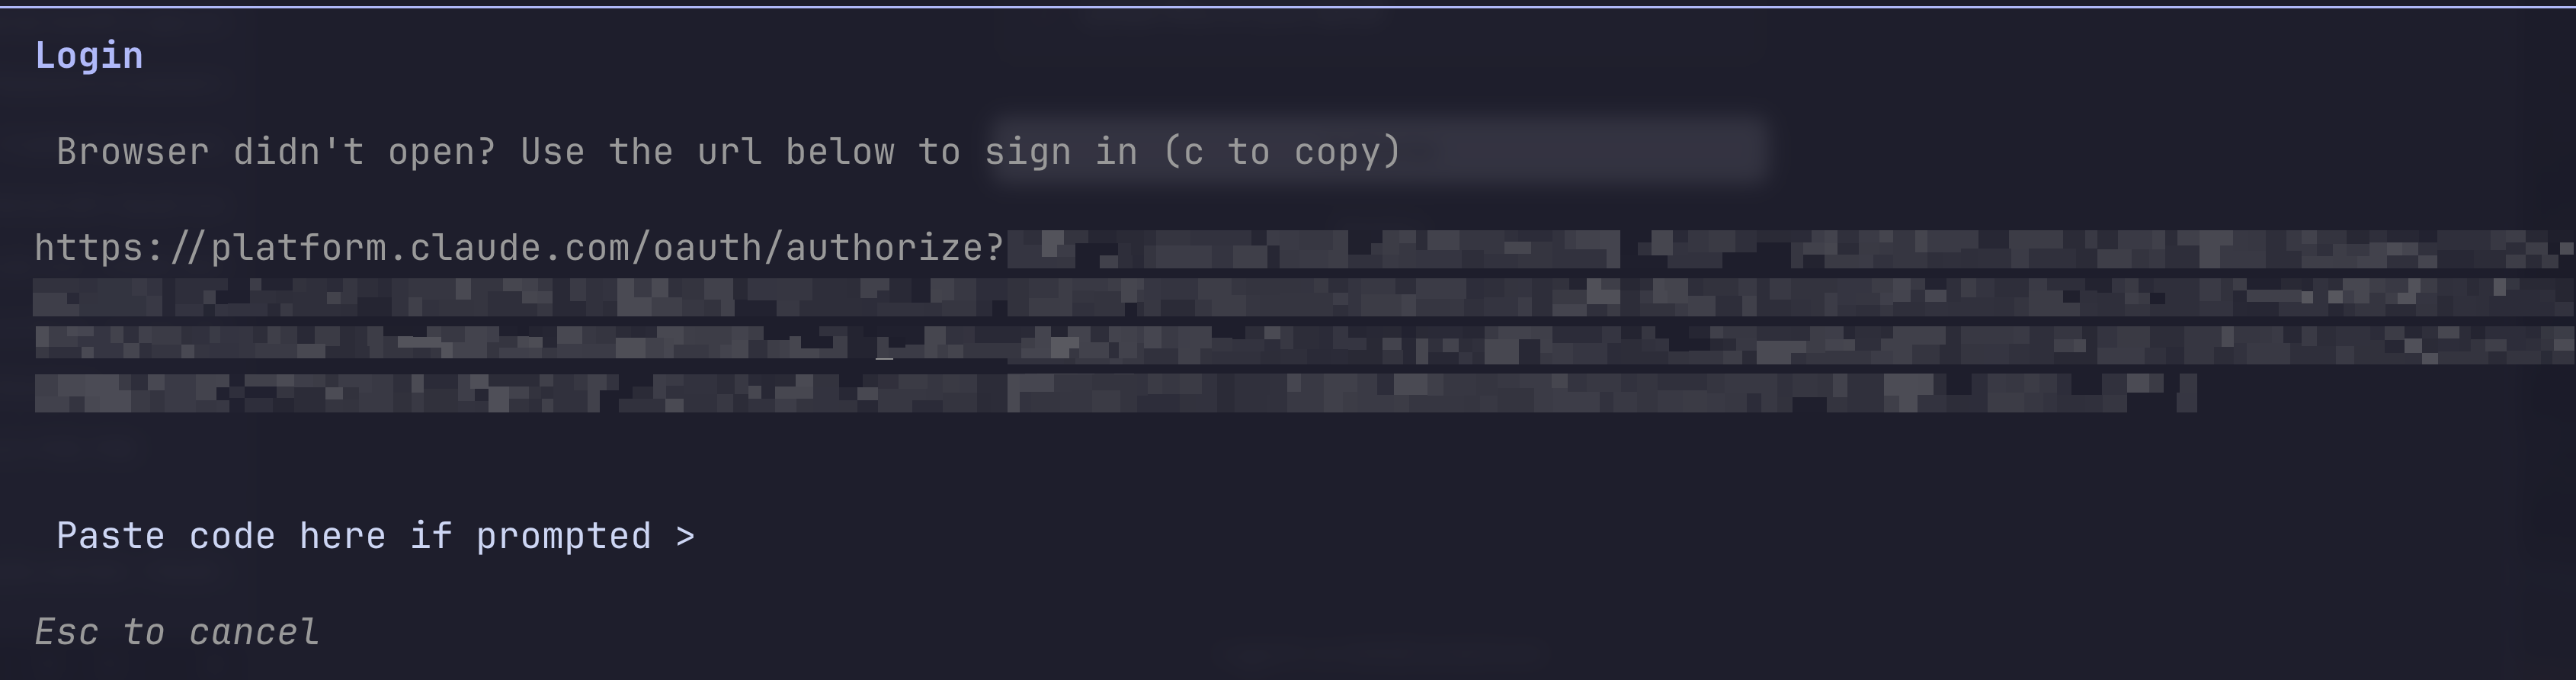
If no window appears, copy the link in Claude Code and navigate to it in your browser:
Once authorized, you’ll be redirected to purchase API credits if your account doesn’t have any yet:
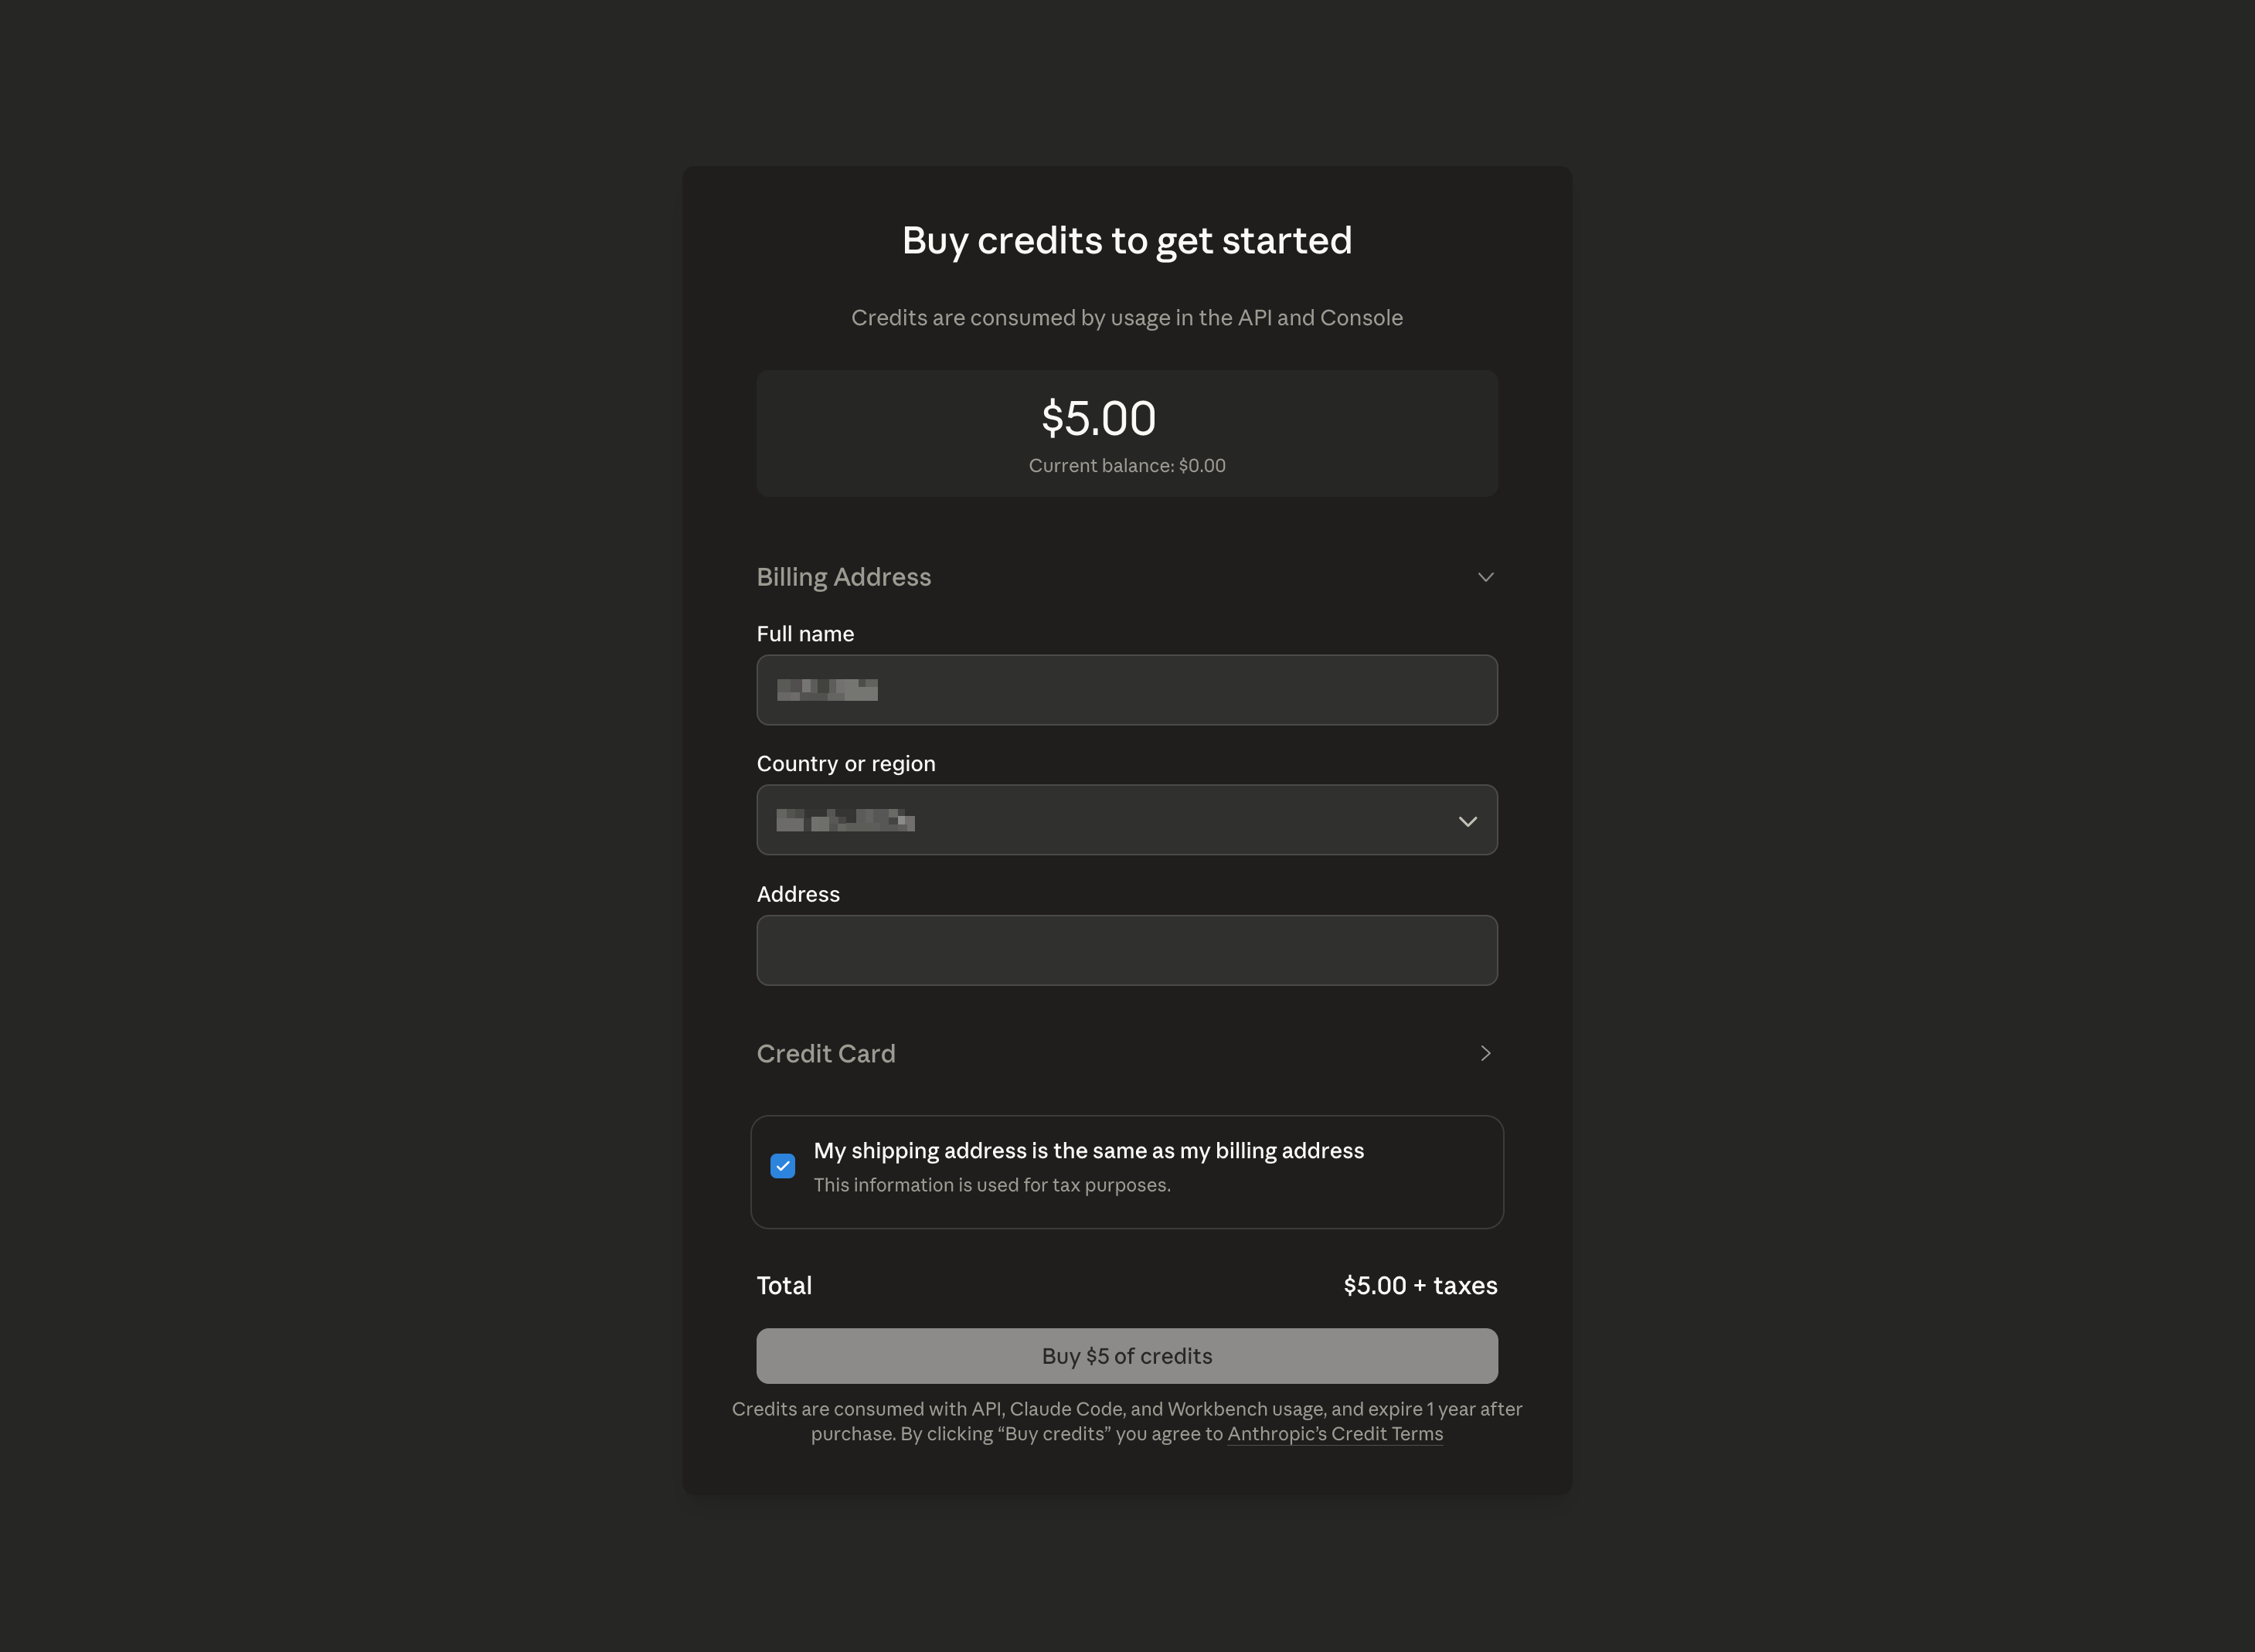
Complete the required fields, such as your billing address and credit card details, then click the purchase button to complete the setup.
You should now see a message indicating you’ve authenticated successfully using the API:
If you didn’t start Claude Code inside your project’s codebase, exit the tool and navigate to your project directory first. Before prompting Claude Code to make any changes, it’s a good idea to provide it with some context about your project. Useful context includes your project’s main goals, any relevant domain logic, and specific business requirements. You should also mention any coding standards, naming conventions, preferred frameworks, or architectural patterns your team follows. Providing this information helps the agent understand your domain and ensures it can follow your project’s standards and expectations when making suggestions or edits.
Claude Code includes a feature that scans your codebase and generates a CLAUDE.md file. This file captures important context about your current project. While you can auto-generate the initial version, it’s best practice to review and customize it further based on your own knowledge of the project.
Run the following command to start Claude Code in your project directory:
claude
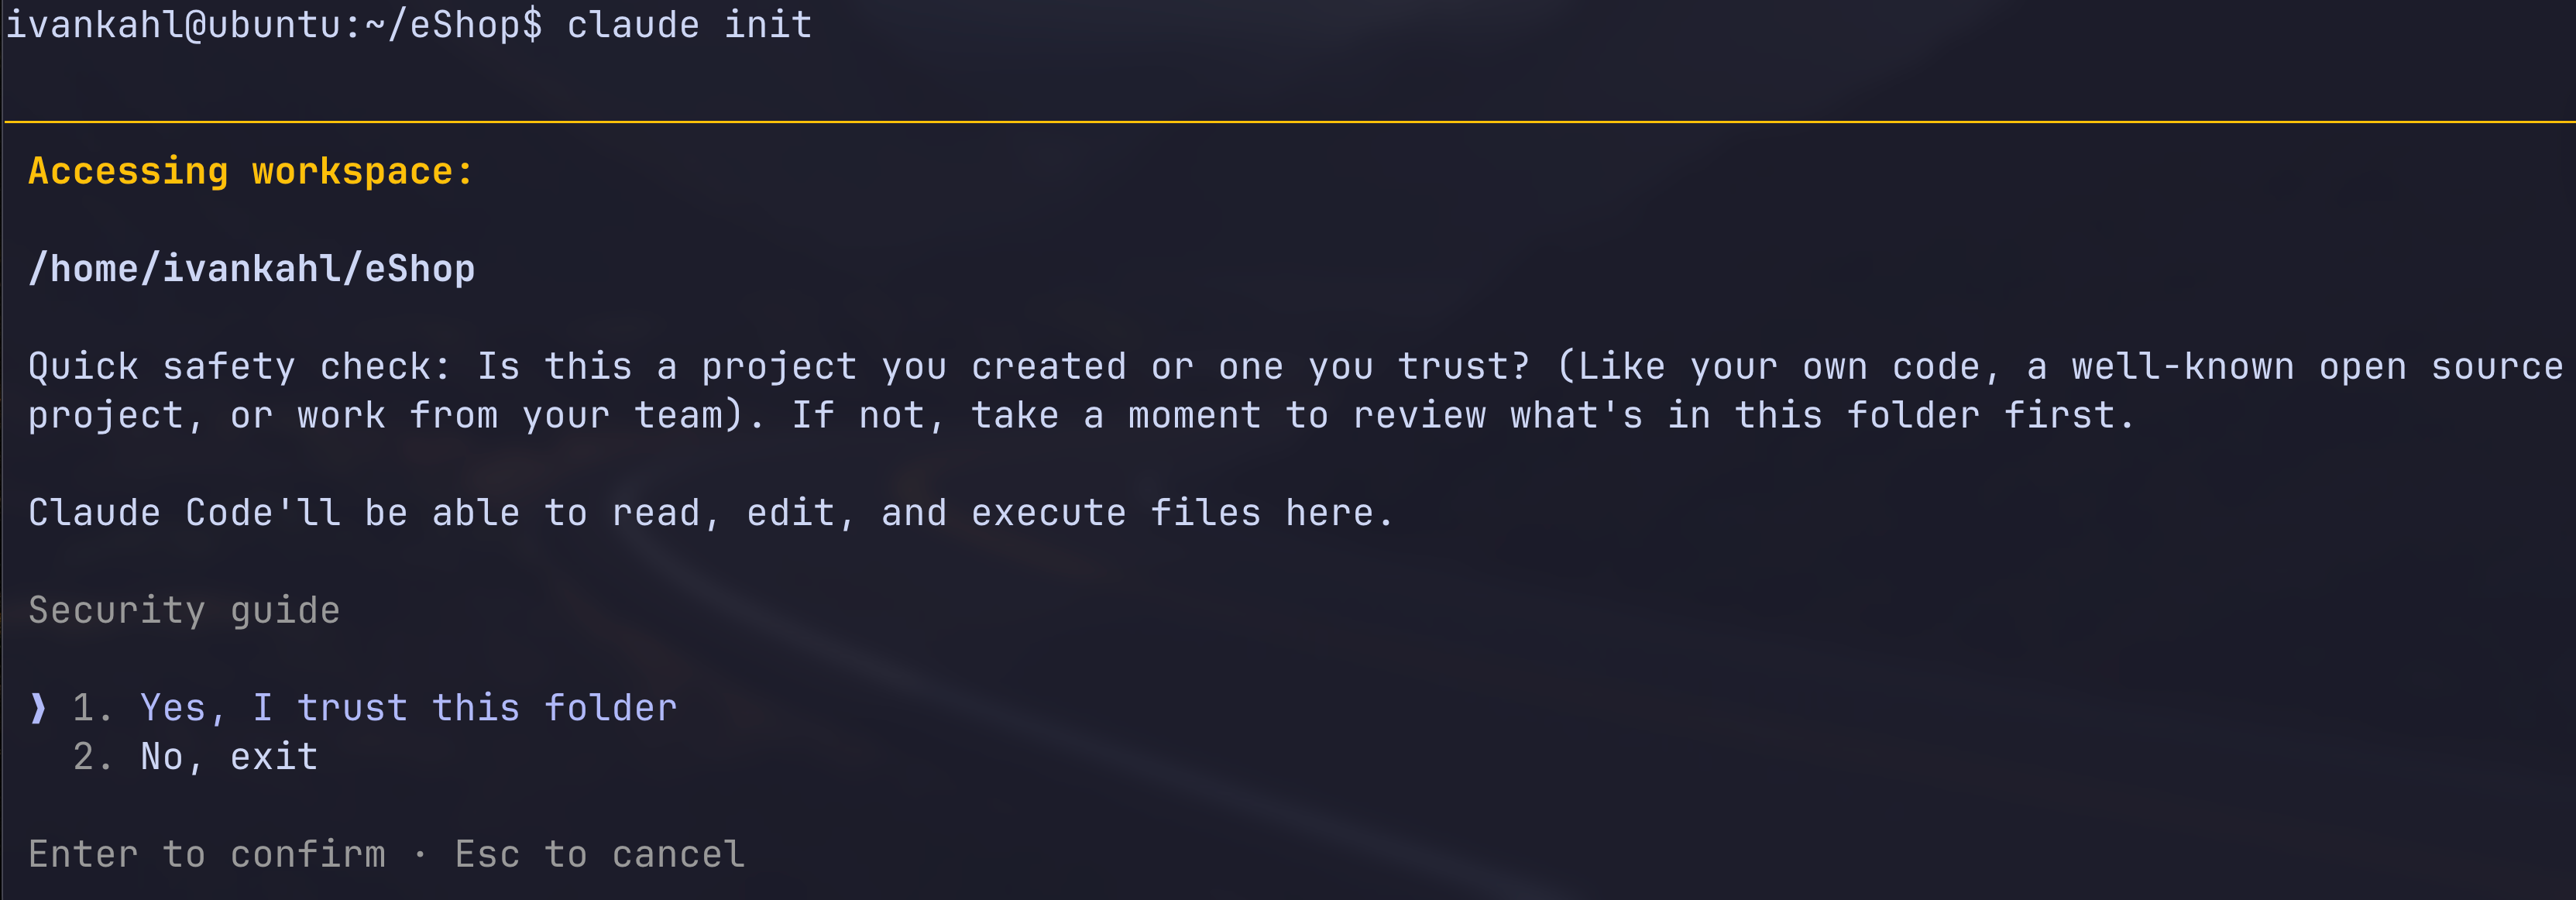
If you’re prompted to trust the current folder, select 1. Yes, I trust this folder to continue:
To generate the CLAUDE.md file, run the following command:
/init
Claude Code will now analyze your project files and folders. Depending on your project’s size and complexity, this process may take a few minutes. When it finishes, you’ll find a CLAUDE.md file in your project’s root directory:
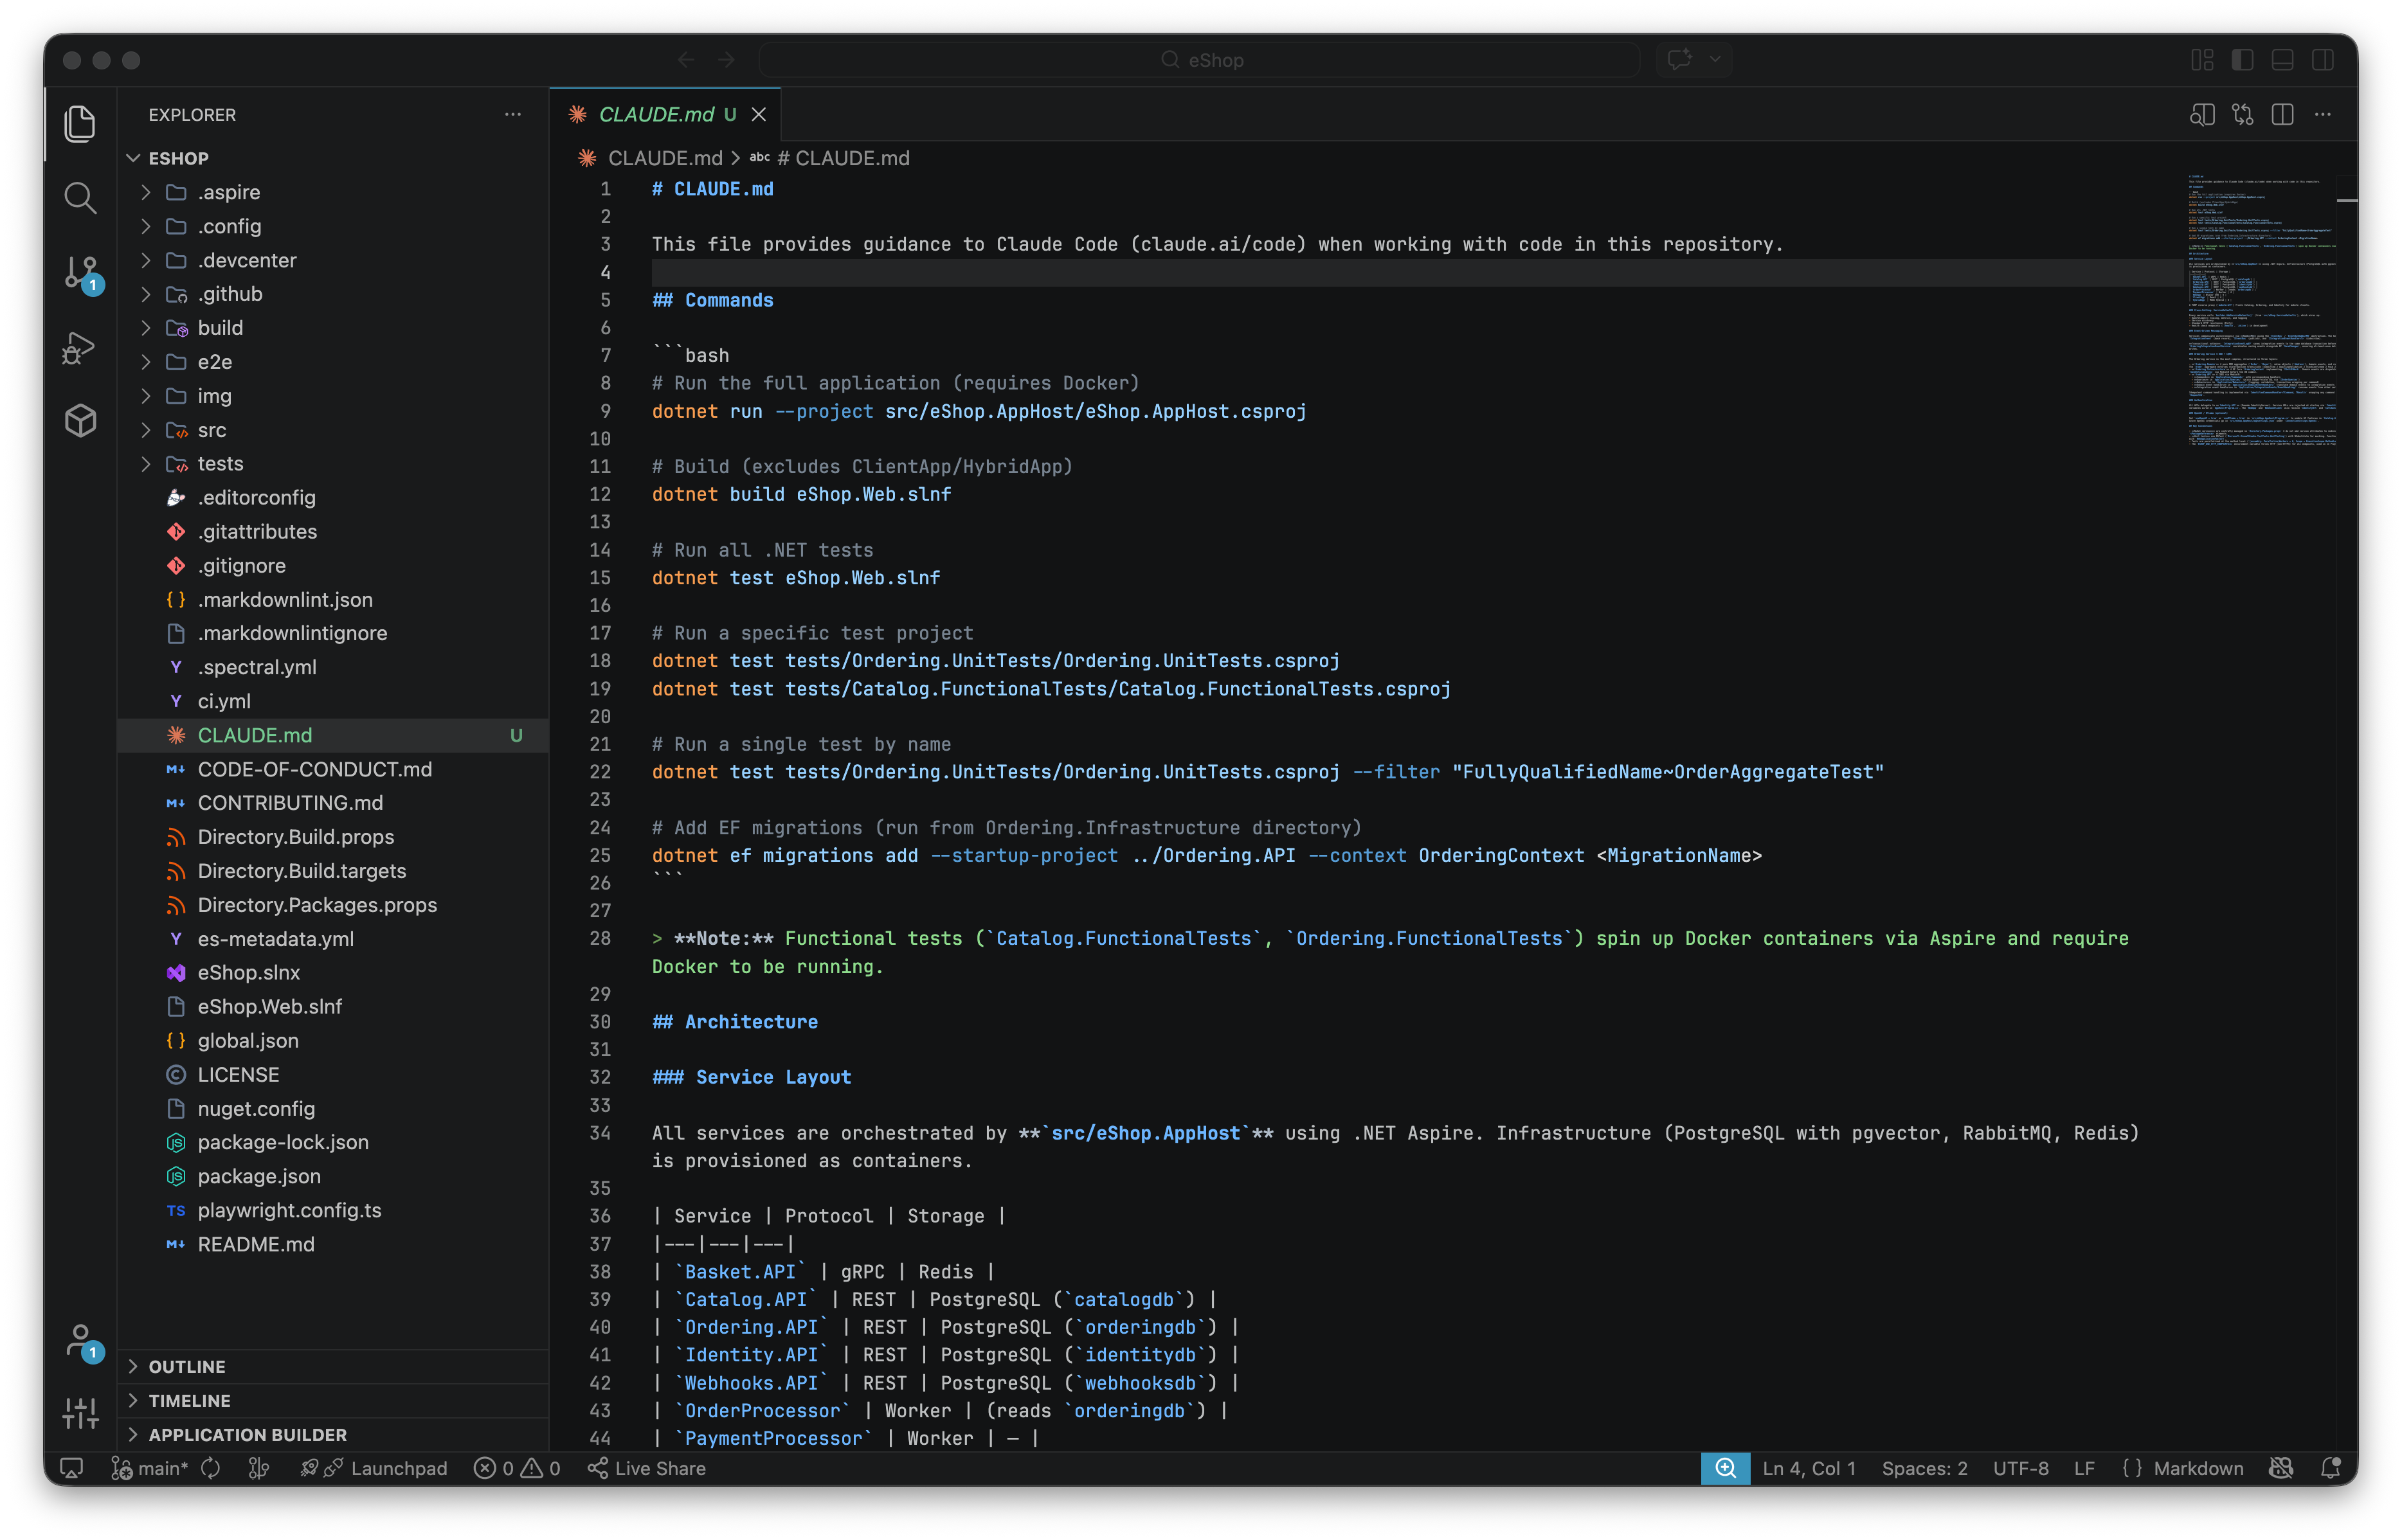
You’ll notice that the CLAUDE.md file includes high-level architectural details and commands for running different parts of your project. Treat this as a starting point. It’s a good idea to revisit and update this file regularly, especially if you notice the agent missing important context when making changes.
With CLAUDE.md initialized, you’re ready to start prompting Claude Code.
Getting the most out of Claude Code depends on how you frame your requests and which model you choose for the task. Since the tool has full access to your codebase, it can handle complex tasks. However, just like any developer, it needs context, clear constraints, and a well-defined goal before it starts work.
Claude Code allows you to switch between different models depending on the task at hand. Currently, there are three model tiers available:
As a rule of thumb, use Sonnet for most tasks. Switch to Haiku for bulk or repetitive work that doesn’t require much reasoning. If you find yourself re-prompting because the output is missing something, try stepping up to Opus for deeper analysis.
You can switch models inside a Claude Code session using the following command:
/model
A screen appears, letting you pick the model you’d like to use:
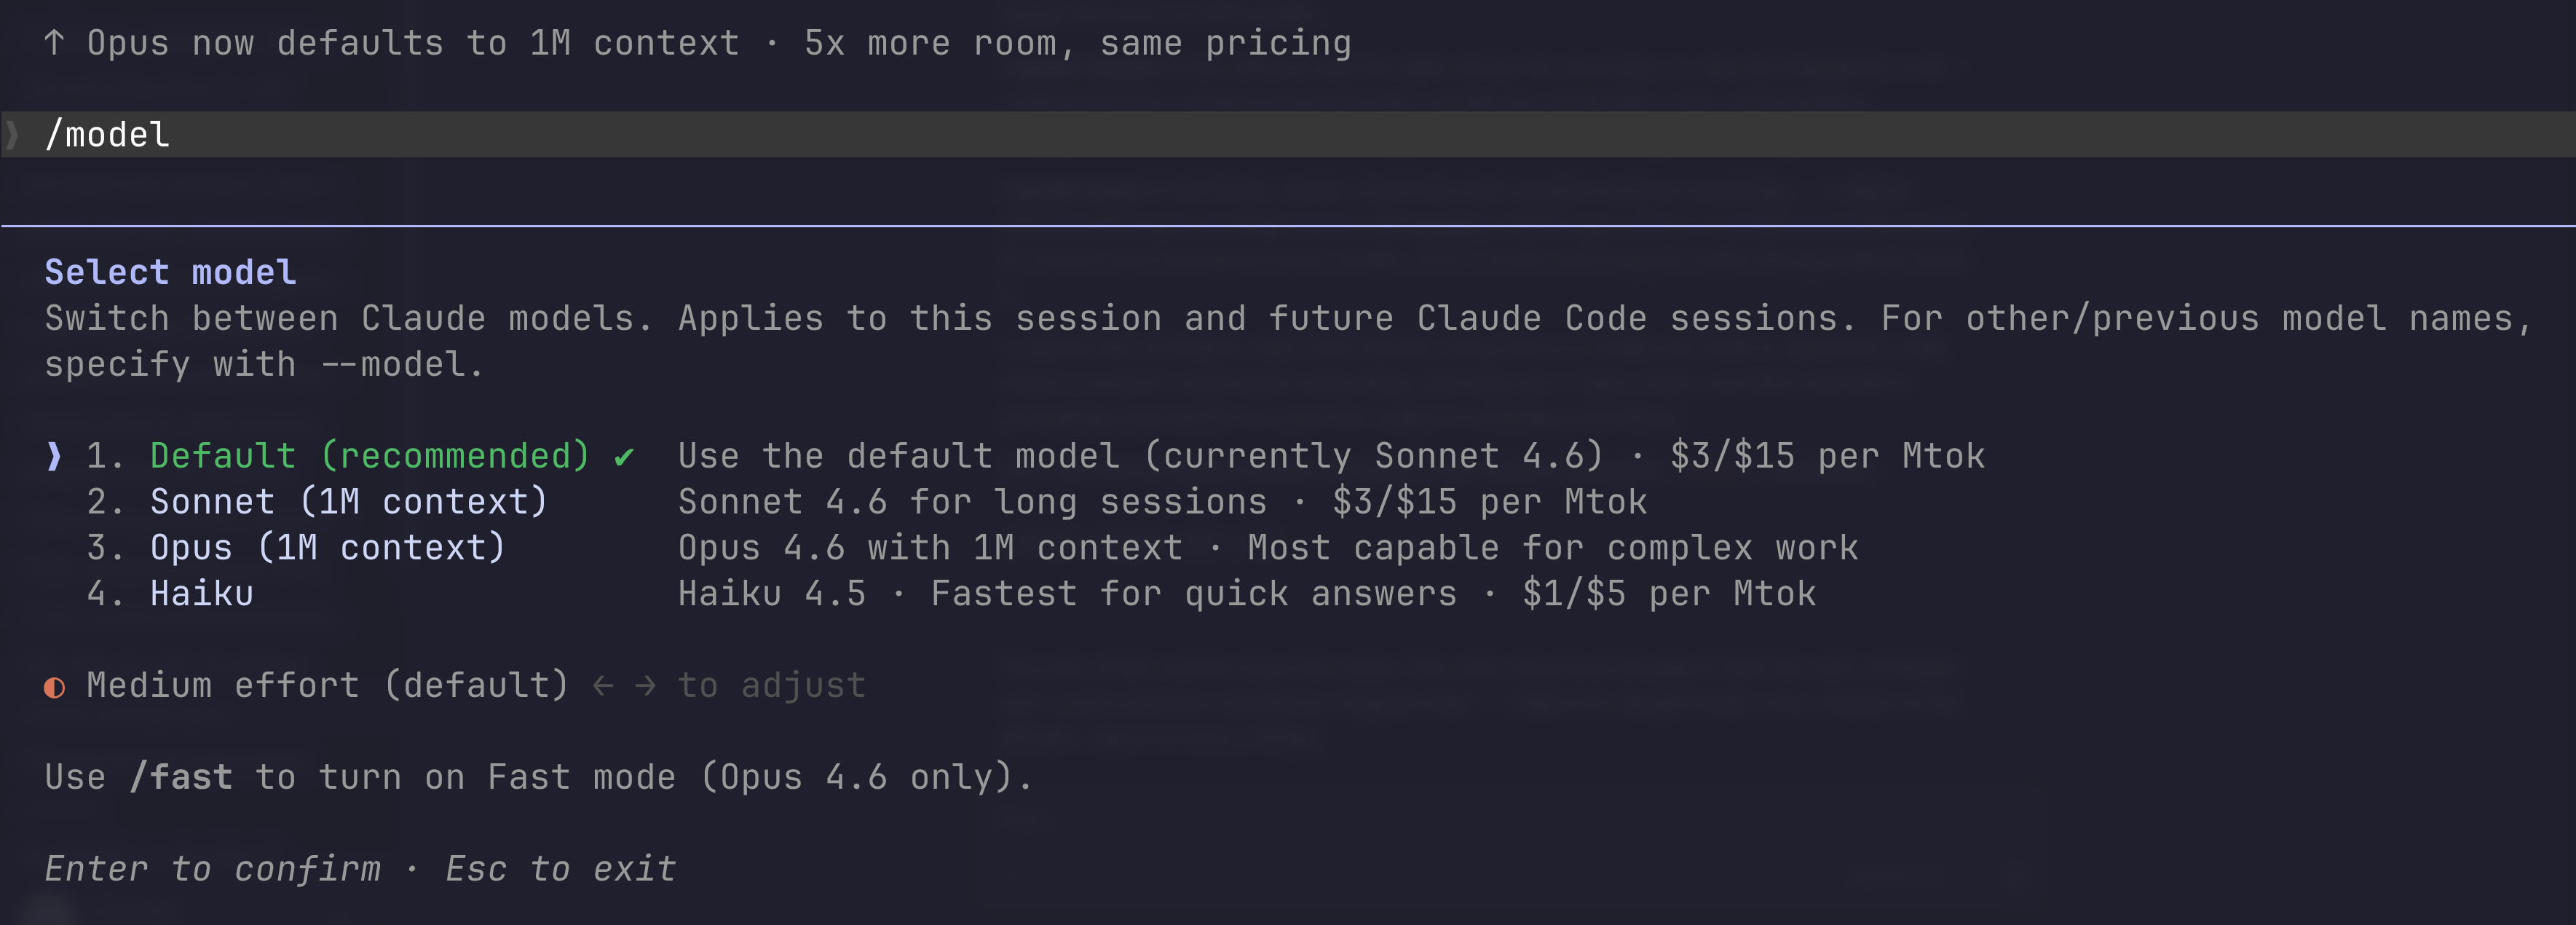
Select the desired model and press Enter.
Vague prompts lead to vague, often unhelpful results. The more specific you are about your codebase, your goals, and any constraints or things to avoid, the better the output you’ll get from Claude Code.
Below are two example scenarios demonstrating how to prompt Claude Code effectively when implementing a new feature and fixing a bug in an existing piece of code on the eShop repository.
The eShop solution has a product catalogue that you can browse. Say you want to add a “Low Stock” warning indicator that appears on products when their available stock drops below a threshold.
A vague prompt to implement this might look something like this:
Add a low stock warning to the product catalogue.
Chances are, the results from the vague prompt above won’t match what you had in mind. The indicator might not look the way you expect, and the tool won’t know what threshold to use for the warning.
Rather, you should use a more specific prompt that includes the context, constraints, and a clear goal for the outcome. The following prompt demonstrates this nicely:
Add a low stock badge to the catalog product cards in the Blazor UI. A product is low stock when AvailableStock is below 10. Update the shared catalog client model to include AvailableStock, render a compact warning label next to the product name in the shared catalog list item component, and add minimal styling for the badge. Do not change Catalog.API domain entities or any database schema/migrations.
With a more specific prompt, the implementation is much more likely to match your expectations. For example, here’s what Claude Sonnet 4.6 produced using the detailed prompt above:

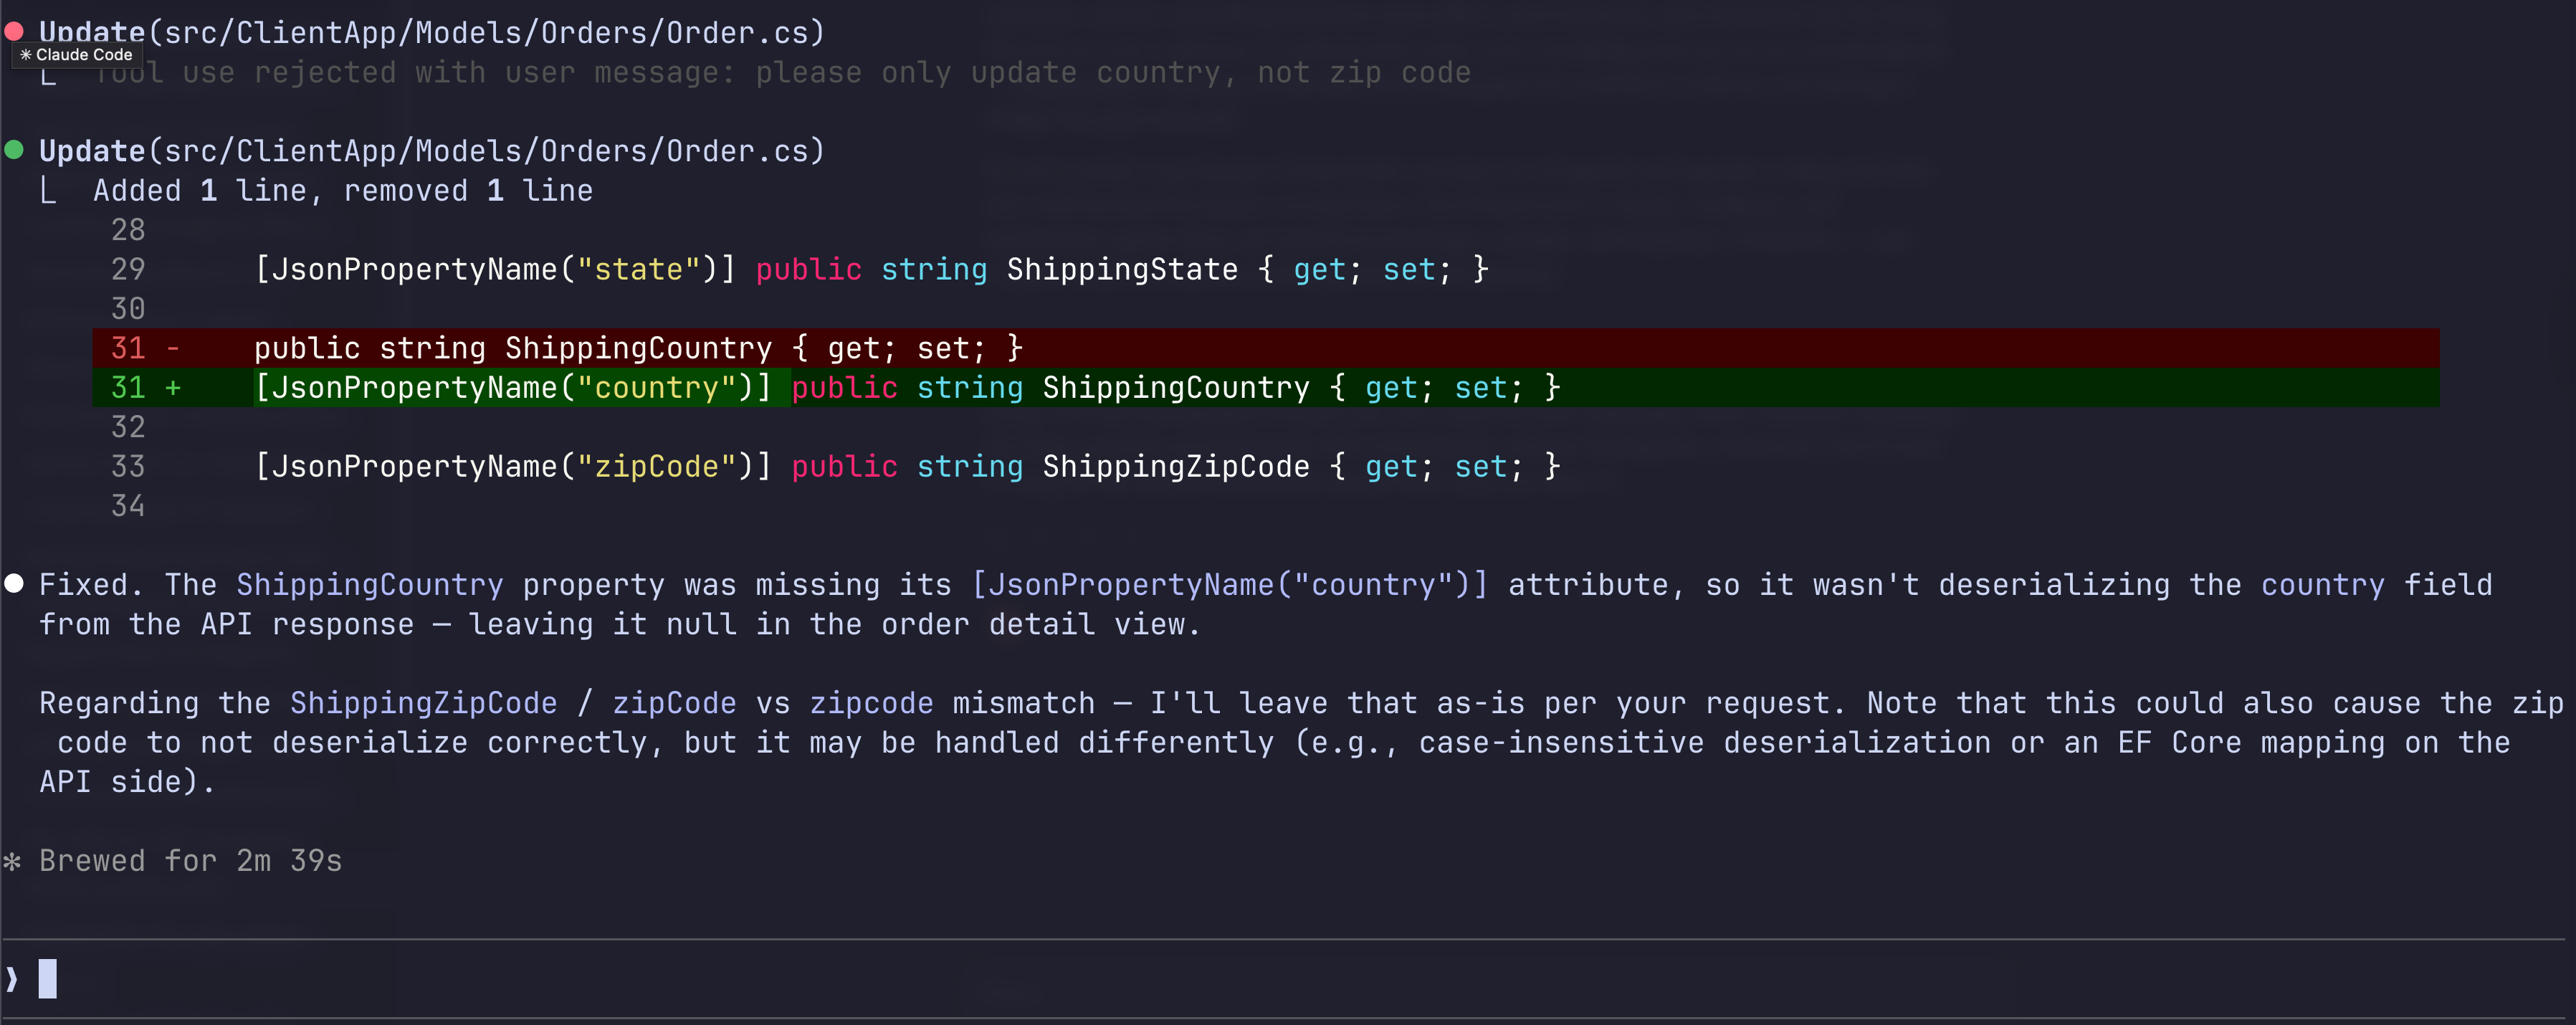
Suppose you’ve found a bug in your project. Rather than manually searching through files, you can ask Claude Code to investigate for you.
When making the request, don’t just send a vague message like this:
Fix the bug on the Order address.
With a vague prompt, Claude Code has no real context about the bug, other than that it’s related to the Order. A more specific prompt might look like this:
It looks like the address on the order is missing. Can you figure out where we might not be passing the value correctly from the DB to the UI? Make any necessary fixes, unless they involve an EF Core mapping. In that case, please ask me first.
Since this bug was tricky to track down, I used Opus 4.6 to run the prompt above. The model was able to identify and fix the missing JSON property name attribute in the client application:
Besides model selection and prompts, there are other techniques you can apply to make the most of Claude Code, which you can find here.
Because Claude Code runs locally, it can interact directly with your codebase, saving you the hassle of copying and pasting code snippets. It can also execute commands to run your projects for you. You can even set up Claude Code to communicate with and use external tools directly, like your web browser, Supabase, or GitHub.
If you’re interested in exploring AI agents and agentic coding further, check out Dometrain’s courses. These go well beyond the basics covered here and will help you orchestrate agents capable of handling complex development workflows.
Get started with integrating AI into your .NET applications effectively using the latest LLM best practices.

Build a Retrieval-Augmented Generation (RAG) chatbot that can answer questions using your data.


Learn how to use AI Agents that can reason, use tools and take action to build products.

Learn to build and consume MCP servers in .NET. Create Stdio & HTTP servers to give your AI models access to external tools, resources, and more


This walkthrough is your hands-on entry point to create a basic C# console application that talks to ChatGPT using the OpenAI API.


© 2026 Dometrain. All rights reserved.

Generate unlimited coding challenges with AI. Practice C#, Python, TypeScript, and JavaScript in your browser with instant test feedback.
Learn more about AI Code Challenge Generator
Learn how to get started with the Model Context Protocol (MCP) and integrate it into your applications.
Learn more about Getting Started: Model Context Protocol (MCP)
Learn TypeScript through hands-on coding exercises. Practice what you learn with interactive challenges designed for every level.
Learn more about Hands-On: Learn TypeScript
Learn JavaScript through hands-on coding exercises. Practice what you learn with interactive challenges designed for every level.
Learn more about Hands-On: Learn JavaScript
Master data structures and algorithms through hands-on coding exercises in C#. Free to enroll for 7 days!
Learn more about Hands-On: Data Structures & Algorithms in C#
Turn your videos into blogs and newsletters with AI. Check out our new product at blogsmith.ai.
Learn more about Blogsmith.ai
See how you stack up against other learners. Track your progress, climb the ranks, and compete with the Dometrain community.
Learn more about Leaderboard
Learn PostgreSQL through hands-on coding exercises. Practice what you learn with interactive challenges designed for every level.
Learn more about Hands-On: Learn PostgreSQL
Learn C# through hands-on coding exercises. Practice what you learn with interactive challenges designed for everyone, from beginners to experts.
Learn more about Free Hands-On: C# for Beginners
Get started with integrating AI into your .NET applications effectively using the latest LLM best practices.
Learn more about Getting Started: AI for .NET Developers
Learn how to build and deploy .NET applications on AWS using CDK, Lambda, DynamoDB, S3, and more.
Learn more about Getting Started: Building .NET Applications on AWS
This guide covers every new C# 14 feature, explains its benefits, and provides practical code examples to help you navigate how you can use them.
Learn more about What's new in C# 14
Build a Retrieval-Augmented Generation (RAG) chatbot that can answer questions using your data.
Learn more about Let's Build It: AI Chatbot with RAG in .NET Using Your Data
Enable enterprise-grade real-time communication for your web apps with SignalR.
Learn more about From Zero to Hero: SignalR in .NET
Master solution architecture and turn business needs into scalable, maintainable systems.
Learn more about Deep Dive: Solution Architecture
A step-by-step process to migrate ASP.NET Web APIs from .NET Framework to ASP.NET Core.
Learn more about Migrating: ASP.NET Web APIs to ASP.NET Core
Let's make the hardest thing in programming easy for .NET software engineers.
Learn more about Getting Started: Caching in .NET
Learn how to test any codebase in .NET with the latest version of xUnit, the industry-standard testing library.
Learn more about From Zero to Hero: Testing with xUnit in C#
This walkthrough is your hands-on entry point to create a basic C# console application that talks to ChatGPT using the OpenAI API.
Learn more about Create a ChatGPT Console AI Chatbot in C#