

Getting Started: AI for .NET Developers
Get started with integrating AI into your .NET applications effectively using the latest LLM best practices.

You’ve probably experimented with AI coding assistants before, and might even have integrated them into your daily development workflow. However, if you’ve been treating them as smart autocomplete or only using them for small tasks, you’re underutilizing them. AI coding assistants have become increasingly autonomous and capable of performing complex tasks. With the right prompting and context management, they can complete complex development tasks.
This guide will walk you through practical best practices for getting the most out of any AI coding assistant. You will start with choosing the right tool and model for your needs, then move on to communicating with your assistant using clear prompts. You’ll also learn how to manage context effectively, set up persistent memory with files like AGENTS.md, and connect your AI assistant to third-party tools using MCP servers.
Before optimizing prompts and context, you must decide on the workflow that best fits your task. AI tools generally fall into two categories: Integrated assistants (IDE or editor-based) and Dedicated assistants (standalone applications).
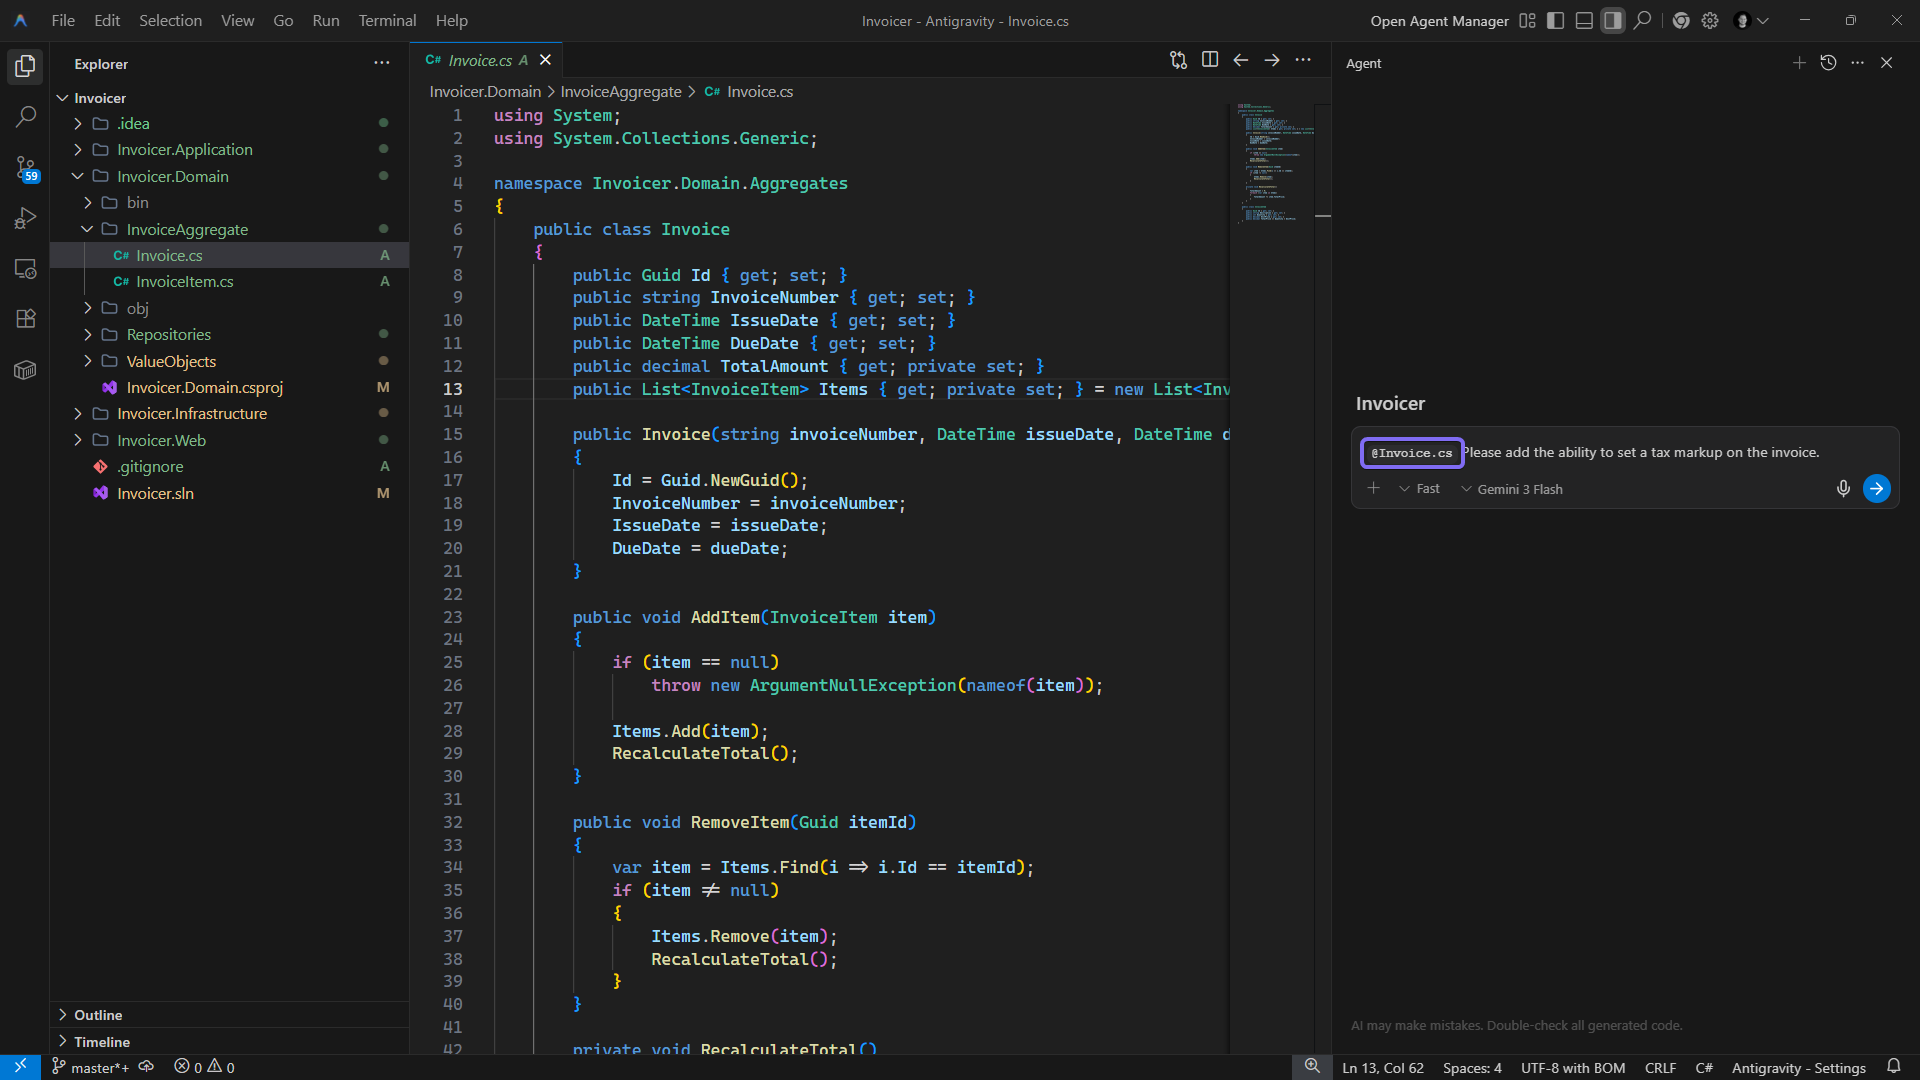
Integrated assistants (e.g., GitHub Copilot, Cursor, and Google Antigravity) live directly in your editor, either as an extension or in their own AI-native editor. They excel at human-driven development, where you drive while the AI assistant provides autocomplete suggestions and chat support. Use these assistants when you need immediate feedback and granular control over the changes they make.
Dedicated assistants (e.g., Claude Code, Gemini CLI, and OpenCode) run independently, typically from a terminal window or desktop GUI. These tools focus on agentic workflows, where you give the assistant a high-level objective and it autonomously plans and makes changes to your codebase with minimal developer interaction. One significant benefit is that they allow you to continue using your preferred IDE while running completely separately.
In practice, a hybrid approach works well. When you want immediate AI-powered feedback and suggestions, use an integrated assistant in your preferred editor or an AI-native editor. At other times, you can delegate a task to a dedicated AI assistant to complete independently.
After selecting your AI assistant, the next step is to configure which models and agent modes it should use for each task.
Most AI assistants let you choose a model to use for your session. When making this choice, consider the size and complexity of your task. Fast models are typically less expensive and offer higher usage limits, whereas more advanced models provide deeper reasoning capabilities but are more expensive and have stricter usage caps.
Faster models are less powerful but still excel at straightforward tasks such as writing basic unit tests, generating boilerplate code, or following an existing plan. Because of their speed, they can quickly make changes across multiple files. Examples of fast models include Anthropic’s Haiku 4.5 and Sonnet 4.5.
High-end reasoning models are slower and more expensive, but they shine when you need to tackle complex tasks. Use these models for architectural decisions, starting new projects, or planning out major features. Popular options include Anthropic’s Opus 4.5, OpenAI’s GPT-5.2, Z.ai’s GLM-4.7, and Google’s Gemini 3 Pro.
Using the most advanced model for every task wastes usage limits and time, while using fast models for complex work often leads to refactoring. Although the performance gap between fast and high-end reasoning models is narrowing, matching the model to the task is important for balancing quality with cost.
Most AI assistant tools offer multiple modes. Each mode has its own focus and may limit what the AI agent can do in your codebase.
Some assistants may offer additional agent modes suited to specialized tasks, such as Cursor’s Debug mode. Agents may also use different terms to refer to the modes above, such as Cline’s Plan and Act modes. Despite minor differences, the functionality in each mode is typically very similar across assistants.
Choose the correct mode based on the complexity of the task you’re working on. Also consider if you’ll be implementing the change, or if you’d prefer an autonomous agent makes the changes, as this will impact which modes you should use to plan and implement the changes.
The quality of generated code depends largely on how clearly you define the task. Vague instructions force the assistant to fill gaps with assumptions, often resulting in code that requires immediate refactoring. To get the most out of your AI assistant, treat your prompts like precise delegation instructions rather than casual chat.
Use imperative verbs to communicate the expected action the AI should perform. You should also remove polite filler words to keep the task clear. For example, instead of asking, “Could you please write tests?”, tell the agent to “Write unit tests for all public methods in the Invoice class.” The second command is far clearer and more direct.
Give context and explain the “why” behind the task so that the assistant can understand the bigger picture and consider potential constraints for the solution. When debugging an error, don’t just paste the error message; explain what you were doing when the error occurred so that the agent has an idea where to start looking. When generating code, also mention which libraries, naming conventions, and file structure to use to complete the task so that the agent generates consistent code.
Consider the example of a bad task description:
Please finish writing unit tests for the
Invoice.csfile.
The task description has unnecessary filler words, and doesn’t give much guidance on how to name tests or which test libraries to use. You’ll likely have to refactor the generated tests to get them to build and pass.
Contrast that with this example of a good task description:
Write unit tests for all public methods in the
Invoice.csfile in theInvoicer.UnitTestsproject. Use NUnit to decorate test methods and assert the results. All tests should be placed in anInvoiceTests.csclass file, and methods should follow the[MethodName]_[Conditions]_[AssertedOutcome]naming convention. Do not make changes to the class file if any tests fail, only write the tests.
It uses clear, direct commands and provides context, including which testing library to use, where to save tests, and how to name each test method. It also prevents the agent from fixing code that might break the test so that the user can do so themselves.
Context is the AI assistant’s working memory. It includes your prompt and any supporting files or instructions needed for the task. The amount of information an agent can use at once is called the context window, and it is always limited. Some newer models, such as Gemini 3 Pro and Flash, support up to 1 million tokens, but this does not mean you can add unlimited files.
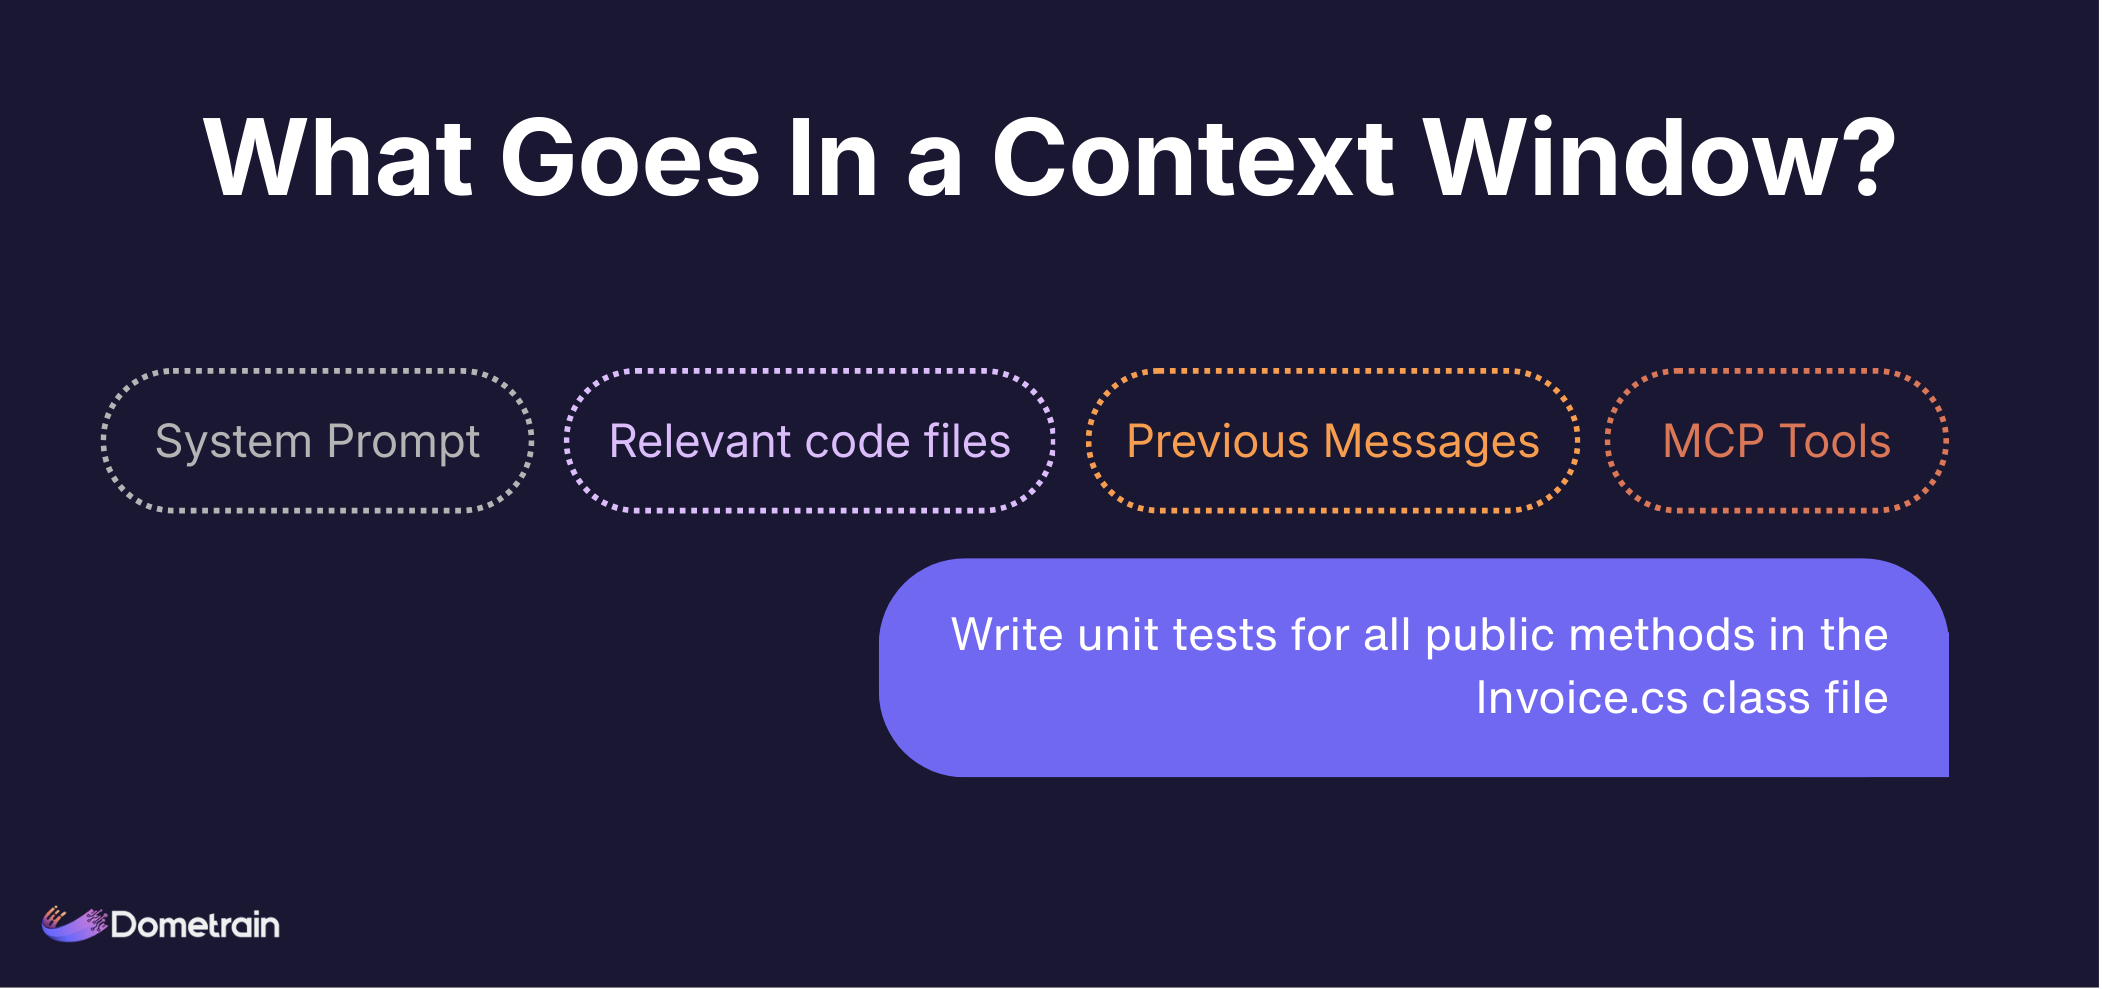
Overloading the context window introduces noise and makes it harder for the agent to identify valuable information in its context when completing a task. This, in turn, increases the risk of hallucinations and impairs code quality. Always keep your context as succinct as possible.
When managing context, assistants usually employ one of the following strategies:
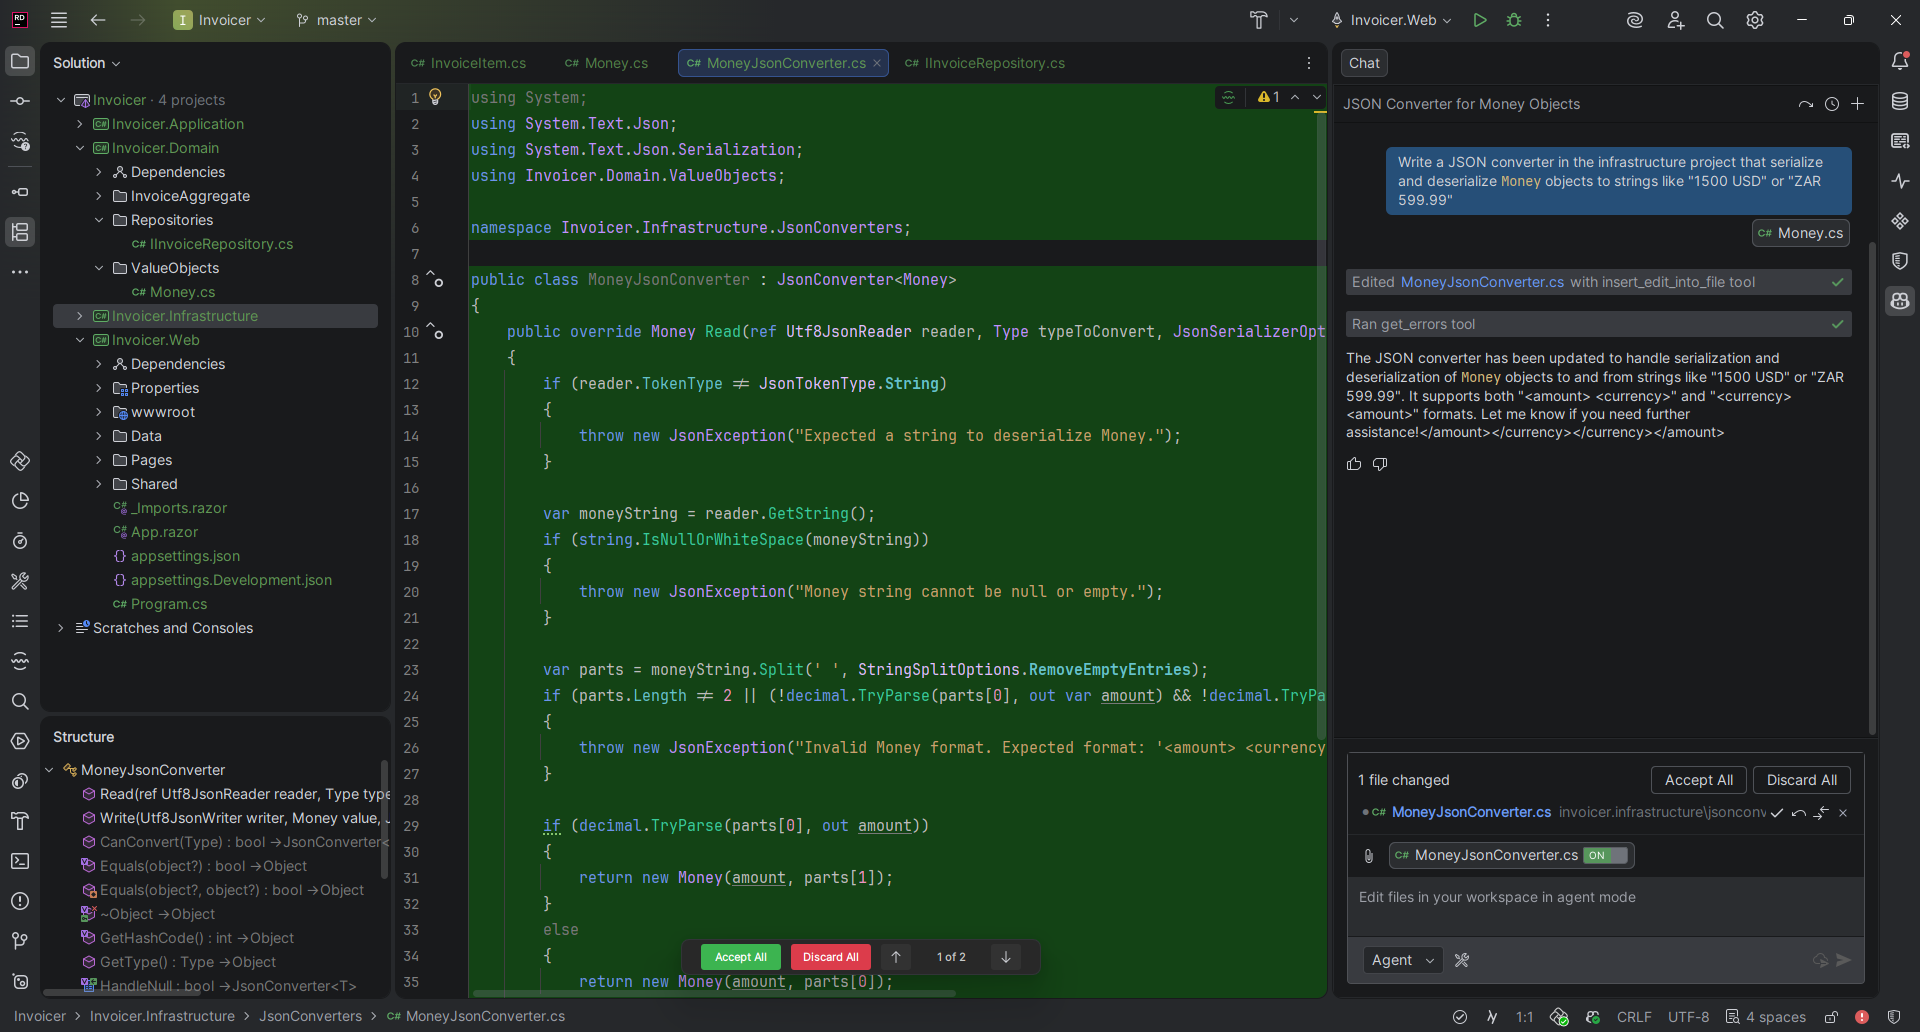
Some assistants, especially those integrated into editors and IDEs, let you manually select which files to add to the context window. This is useful for guiding the agent on what naming conventions to use, which technologies and libraries are available, and potentially other similar code implementations to base its solution on. You can also add your open editor windows to the context window so the assistant can assist with your current task.
Remember that context windows are limited. Only add files that will benefit the AI assistant in completing the task or providing a response to a question.
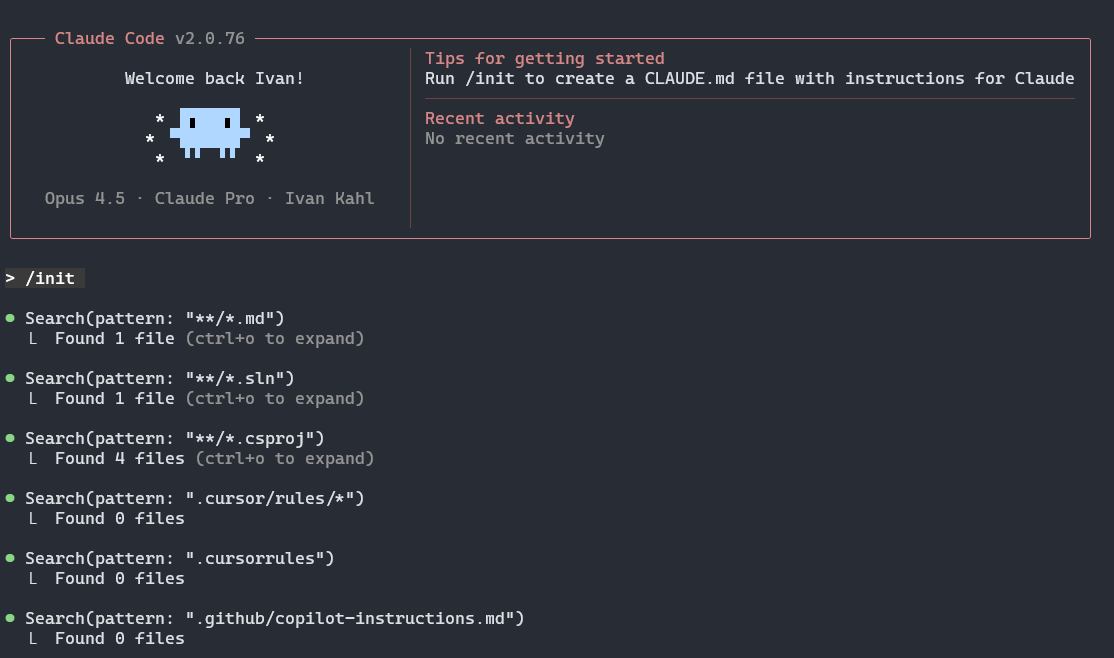
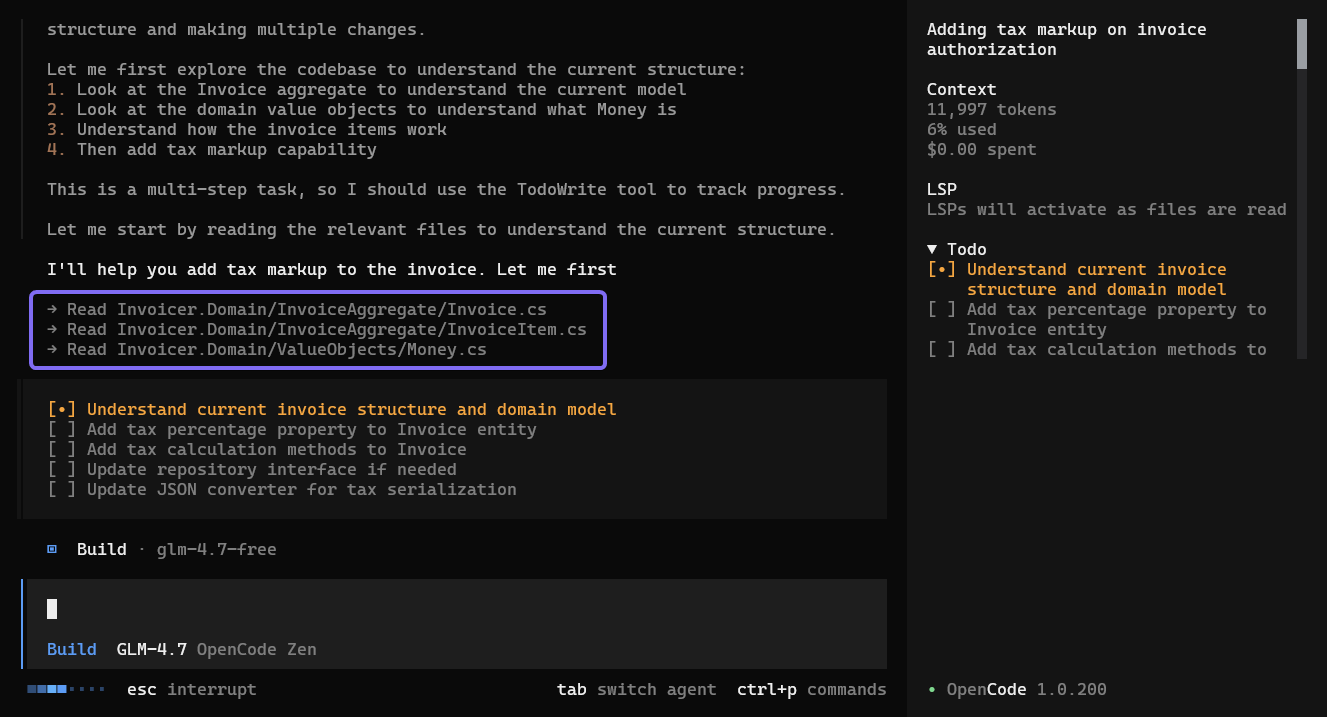
Some AI assistants, such as Claude Code and OpenCode, don’t offer the option to add files directly to the context window. Instead, they rely on Context Engineering, where the agent scans your project, decides which files look relevant, and loads those into its context automatically. If you want to point the agent to a particular file, you can reference it by name so that it considers that file while gathering context from the codebase.
Below is a screenshot showing how OpenCode loads the content of relevant files into its context window:
If you want specific information always to be available to your assistant across multiple sessions, consider using a memory file.
While the strategies above are helpful for communicating and managing context in a single session, you may find yourself repeating the same information each time you start a new session with your agent. Fortunately, most AI assistants address this by allowing you to create a file that serves as persistent memory for new agents.
There are multiple implementations of AI readme files, with the most widely supported one being AGENTS.md. There are also tool-specific files, such as Claude Code’s CLAUDE.md file, Google Gemini’s GEMINI.md file, and Cursor’s Rules. However, most assistants support the AGENTS.md file, making editor-specific memory files unnecessary, unless you need a feature that’s not supported by AGENTS.md.
These files contain information about the current project and get added to your assistant’s context window at the start of every session. The information inside includes project architecture, coding conventions, standard terminal commands, project-specific terminology, and any other information that’s useful for an agent to know when working on your codebase.
It may take some effort to create a thorough memory file, but doing so will save you time in the long run. Your agents will start each session with a solid understanding of your codebase.
Standard AI models rely on static training data, leading to outdated code. The Model Context Protocol (MCP) solves this by connecting agents to live documentation. It also lets AI assistants interact with external tools.
Documentation MCP Servers let assistants search and retrieve documentation for libraries and frameworks. This reduces the chances of assistants hallucinating framework code or using deprecated packages, and ensures it always uses the latest best practices. For example, you can set up your assistant to use the Microsoft Learn MCP server to access Microsoft documentation, including the latest .NET and C# documentation.
MCP goes beyond data retrieval. It allows your assistant to interact with and modify external services. This means your assistant can fetch data from a database or update your project management system, not just generate code. For example, the Supabase MCP server lets an agent run queries and migrations on a Supabase database and view your Supabase logs. The Atlassian Rovo MCP server also allows your agent to make changes in Jira, like leaving a comment on a task it’s working on or updating its status.
By combining multiple MCP servers, you can automate large parts of your development process and build powerful autonomous workflows, such as an autonomous agent that creates PRs and updates Jira ticket statuses when working on a task.
Using coding AI assistants effectively means going beyond autocomplete. As AI models have become more powerful, most issues with generated code can be corrected with proper communication and context management, even when working on complex tasks.
By selecting the proper workflow and model, providing clear instructions, and managing context carefully, you can improve code quality. Setting up a memory file provides your agent with the background needed for future tasks, while MCP servers enable your agents to access up-to-date information and modify external systems.
If you’re interested in learning more about how AI agents can enhance your development workflow, check out Dometrain’s AI-related courses below.
Get started with integrating AI into your .NET applications effectively using the latest LLM best practices.

Learn how to use AI Agents that can reason, use tools and take action to build products.


Deep dive into Artificial Intelligence to improve developer productivity


© 2026 Dometrain. All rights reserved.

Generate unlimited coding challenges with AI. Practice C#, Python, TypeScript, and JavaScript in your browser with instant test feedback.
Learn more about AI Code Challenge Generator
Learn how to get started with the Model Context Protocol (MCP) and integrate it into your applications.
Learn more about Getting Started: Model Context Protocol (MCP)
Learn TypeScript through hands-on coding exercises. Practice what you learn with interactive challenges designed for every level.
Learn more about Hands-On: Learn TypeScript
Learn JavaScript through hands-on coding exercises. Practice what you learn with interactive challenges designed for every level.
Learn more about Hands-On: Learn JavaScript
Master data structures and algorithms through hands-on coding exercises in C#. Free to enroll for 7 days!
Learn more about Hands-On: Data Structures & Algorithms in C#
Turn your videos into blogs and newsletters with AI. Check out our new product at blogsmith.ai.
Learn more about Blogsmith.ai
See how you stack up against other learners. Track your progress, climb the ranks, and compete with the Dometrain community.
Learn more about Leaderboard
Learn PostgreSQL through hands-on coding exercises. Practice what you learn with interactive challenges designed for every level.
Learn more about Hands-On: Learn PostgreSQL
Learn C# through hands-on coding exercises. Practice what you learn with interactive challenges designed for everyone, from beginners to experts.
Learn more about Free Hands-On: C# for Beginners
Get started with integrating AI into your .NET applications effectively using the latest LLM best practices.
Learn more about Getting Started: AI for .NET Developers
Learn how to build and deploy .NET applications on AWS using CDK, Lambda, DynamoDB, S3, and more.
Learn more about Getting Started: Building .NET Applications on AWS
This guide covers every new C# 14 feature, explains its benefits, and provides practical code examples to help you navigate how you can use them.
Learn more about What's new in C# 14
Build a Retrieval-Augmented Generation (RAG) chatbot that can answer questions using your data.
Learn more about Let's Build It: AI Chatbot with RAG in .NET Using Your Data
Enable enterprise-grade real-time communication for your web apps with SignalR.
Learn more about From Zero to Hero: SignalR in .NET
Master solution architecture and turn business needs into scalable, maintainable systems.
Learn more about Deep Dive: Solution Architecture
A step-by-step process to migrate ASP.NET Web APIs from .NET Framework to ASP.NET Core.
Learn more about Migrating: ASP.NET Web APIs to ASP.NET Core
Let's make the hardest thing in programming easy for .NET software engineers.
Learn more about Getting Started: Caching in .NET
Learn how to test any codebase in .NET with the latest version of xUnit, the industry-standard testing library.
Learn more about From Zero to Hero: Testing with xUnit in C#
This walkthrough is your hands-on entry point to create a basic C# console application that talks to ChatGPT using the OpenAI API.
Learn more about Create a ChatGPT Console AI Chatbot in C#